AMS road shader proper mapping and vertex painting.

Hi guys. Because of the several tasks how the reiza road shader with marbles works i prepared this straight forward technique im using with awesome software Blender.
1) At first need to say the Reiza groove shader needs 3 UVmaps in blender on the right bottom side on the picture
UVMap - for main road texture and specular texture
UVMap.001 - for detail texture and normal texture
UVMap.002 - for groove texture mapping
blender_0nzw9tdtmU.png
2) If you want to have skidmarks and marbles also on the curbs so need to prepare the curb object with UVMap and UVMap.002. And you need to use rz rumble strip shader.
UVMap - main texture of the curbs
UVMap.002 - groove texture
!!!Important is to have for groove texture the same name of UVMap.002!!!
blender_QX1gRvRivD.png
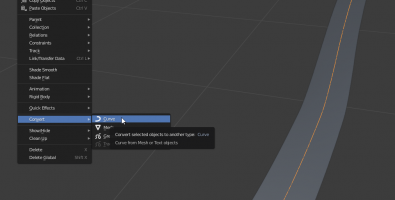
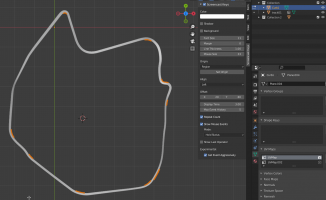
3)To create proper UVMap.002 which is following the racing line im starting with extracting the centerline of the road and convert it as the curve.
blender_MOietGSPD6.png
blender_cf57tREUC2.png

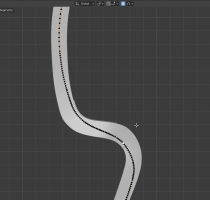
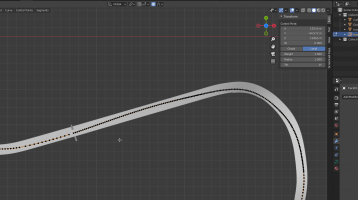
4) With proportional editing activated (blue icon on the top of the picture) im starting to modify this curve to follow the ideal racing line.
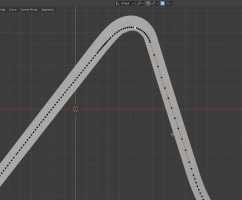
blender_FJL5TUKxtJ.pngblender_pdMfZwYZ5t.pngblender_JhleiGuj3S.png

5) Then i add new object (plane) and i rename it to groove in outliner. !!!Important is to have just one single UVMap.002!!
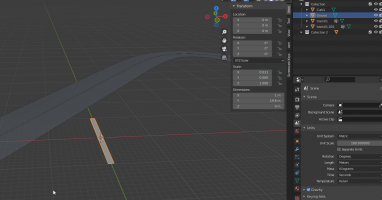
blender_RYTIMMXttZ.png
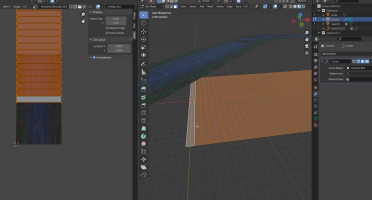
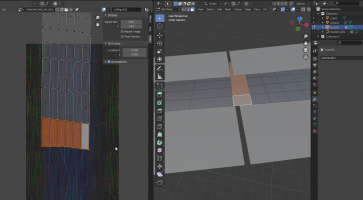
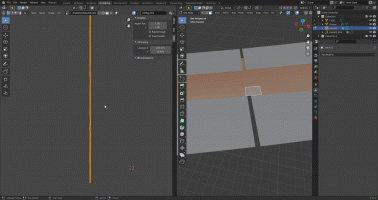
6)Then i apply array modifier and curve modifier and i apply array modifier so just curve modifier is in modifier stack. Now its neccesary to adjust mapping so with all faces selected and just the first one selected as active i unwrap object with option follow active quads. This will unwrap all quad so they are following the first one.
blender_UiEEjaJn3o.pngblender_e5mNJ83jHC.png
 
Last edited:
7) Important is to have this fake road as big as possible to overlap the original road especially in the corners because we will be projecting the UVmap
blender_CsUkp1FefI.png
8) Now the important magic step. Now we transfere UVMap.002 from object Groove to original road so with original road selected i add Data transfer modifier where i pick the Groove object as a source and in "Face corner data" section choose "Nearest face interpolated" and click to UV's. This will project UVMap.002 from object groove to original road.
blender_6p9rKcVnQ9.png
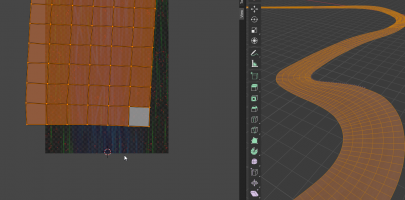
9)After applying of Data transfer modifier you can see the mapping in UV editor. Now its necessary to identify couple faces which are intersection the gap where the groove object strarts and ends.
blender_5nu2ydhDcD.png
After you identify it you can move the upper vertices of these faces down to match the spaces between neighboring faces.blender_T6k3LZeYQy.png
10) Now we only adjust the scala if the UV map in X direction to match roughly the texture width and also scale in Y direction to avoid repeatability of the texture.
blender_mNUambze5N.png
N0PUsvTXUh.gif
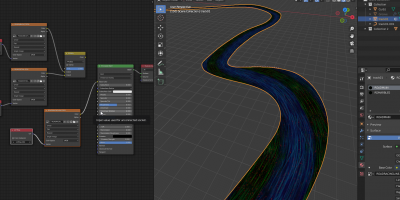
11)Now the proper UVMap.002 is done and when we apply the vertex colours it will looks awesome in game. To see the texture in the viewport its necessary just to add texture node in shader editor and attach the UVMap node to the vector input where you select UVMap.002. After you attach this texture to Principled shader the texture appear in the viewport.
blender_B0WS8uGeAb.png
Now the mapping is ready and next step is to draw vertex colours to activate the groove/skidmarks/marbles effect in the game. In next post i will explain how to do that.

Because you want to have the skidmarks/groove also on the curbs because rz rumble strip support it its necessary to join the curb object with the road object and do the data transfer and scaling of the UV map together. But afterwards if you want to have road and curbs as a single object in the game you have to separate back curb object and rename UVMap.002 to UVMap.001 and join back with road mesh. Why? Because road shader is using 3 UV maps and groove is in UVMap.002 (3dsimed read it as slot 3) but rz rumble strip shader is using only 2slots where the groove should be in slot 2 from the point of 3dsimed view. But road shader is using second slot UVMap.001 (in blender) as roaddetail mapping. Quite complicated but i didn't find better option.
blender_PquUN0vtMG.png
 
Last edited:
This is how im doing vertex painting in Blender to activate the groove texture.
1)If you have already separate material for marble zones you can duplicate and separate them as a single object.
AM-JKLVwI6u60Yj_ZilS7RvfuPWztzcVHhRufgml89hOserp-OLHKiZg55NeCa-NZF2TGWw2av8QKNib_ktzWTqRcGTrcw2zQwf_rlFPfnvuBiJWNdRhpvo584cerXLSiOfm0PAhEz2vfloAWq36_0Ron_oh=w1745-h836-no


2)I create new object (plane) from what i create the groove so should be roughly wide as the groove will be.

AM-JKLVhjUbg0RHd1nd0eUBU6oJ2-tFz28Qzfq5cQ6zNLPi9BytN_7UgV3EizCfbPg3yVCEHS6qikHkvs_IgYDlmJLazQSW6FFskqZQ4j_RBDLYBimI7aCEMzjaBnLGVoSNDGLRaOzhkTT0AL6TgjZrHXy4E=w1848-h865-no

3)In vertex paint mode i will colour the groove with fully blue and marble object with fully red color.
AM-JKLUle_ey_wSdsAdVG19mduGaOEkXlM27hl2VhqFXbq23iyiVoJYUHY20S1w1YhyOJ_ERmbOv6fubawdMGILjNMoX8dZArbnyW_ZFAwYFhNLL8wF-5ubo7IX7XY1rBtDp1Yns3kB8SmDwAGR5kIIhBu2Z=w1789-h888-no

4)Then i change colour of the brush to black and decrease slightly strength and delete the blue color on straights where the groove is not so markable.
AM-JKLV57JbrCBVgvohACxDNIFe1jZEQBjbPuxuPYWcbZ9efsZ_mduQnenmxnkufnyE5yiFfokXxB7y3FFxaWHkkXGFZLwosou0ocBPSunbUq2Y4XN373Z8j0kkx2PBChCkHBw3Y9Nyk1Vlov8ClRhAcJ742=w1854-h869-no

6)Now i add the new vertex color to the road object and in vertex paint mode i colour it to fully black.
AM-JKLXz65gMCnvtJWtmPAZ-RPEZl3DcfkWDDGcwQcKnuojfimF_fazLEQgSnMK9URfZYCCijkvuANi-rSoJzJeSd_y9ytIVT5HMCit5e7Ov6atugF66Kzd-b8FfwxEjKvhG8ECElqUWWnCHwgZkaquvYk25=w1910-h882-no

7)And now the same magic as for UV Maping im using Data transfer modifier to project both objects for marbles and groove to the original road mesh. This time im projecting Vertex colours. After applying the modifiers you can see the result in vertex paint mode where you can smooth the colours to better (not sharp) transition.
AM-JKLXB1XXsg-OeqOTG-w_Qt4rfg1L7UQGosX7QtEvcCbWH8W_YtWfUxew5Aeq-r5dBpYD9RIW3slgPdRwE-WbLBPnoZgtgBZ4xby1CT5pzVvKxUkvnLev6h9-KzNOQhHgwvMWhSZDyoL4rAk3A7ADUjqSv=w1909-h886-no

8)Finally in vertex paint mod i draw the rest skidmarks with green and light blue color where the cars are braking or acceleration like for example on the starting grid.
AM-JKLWcxGfhx82ejdRvqluRFJZtvDOJVAvOP9nYFIWzL4f2SAhP6IBstSV0PI1_anUYbj4rCd7cRdG3gGty608eLvOaV35Frz7hYixOLNt2NspjWs1oO1HXkWuBhUo36pl2u82WioprzuELOJOZeWyLff5d=w1266-h870-no

Thats all. Now the road mesh is prepared for exporting to 3dSimed.
 
Last edited:
This is SO amazing. :thumbsup: Wow. And in such detail too... even GIFs! This looks very much reproducible by other modders. Thank you so much for putting your time into this, Martin. I'm sure this will be really useful in the community.
 
Hey Martin, Thanks for the write up, You may be able to help here, Ive done all the Vertex Painting and Applied the Correct Shaders, i have also checked it was correct by using the Adeliade in AMS as reference.

When i open it up in game, it still shows up with the Rainbow Road effect, is there something i may be missing, as i have got it to work in the past but for some reason when exporting from 3DSimmed into AMS it doesnt work.

Cheers : )
Can you share the screen of the shader setup in 3Dsimed?
 
Back
Top