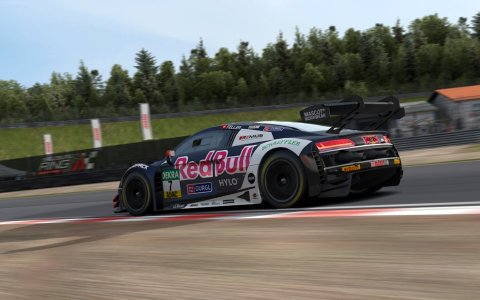
Skins chrome effect avaliable on AC!

HI folks!..well im justa messenger..Thanks to Charles Amyouni now its posible to make skins whit the chrome!..just follows the instructions of this thread:

http://f1classic.your-talk.com/t19483-tutorial-chrome-nickle-carbon-fiber-on-carpaint-area

Well..i tries to make a skin..but my habilitis to manage 3dsim not are very well...so skinners..if you want to try some skins whit this coolness effect..go ahed!!!
example:
unGRDKF.jpg


All credits to charles Amyouni.
 
well sure it is, but it needs special shader settings inside the kn5, nothing that can be done just in skin files
yes, but managed the kn5 file of the car in 3dsimed can be edited...of course ..would be great if only AC support this chrome paint..(like the olds days of rfactor) but at least..whit this method is posible..
 
yes, but managed the kn5 file of the car in 3dsimed can be edited...of course ..would be great if only AC support this chrome paint..(like the olds days of rfactor) but at least..whit this method is posible..
I am aware that 3DSimed can edit kn5 files, but my experience with these kinds of "mods" tells me that for example all the old skins won't really work anymore.
My Audi here has its shader set up in a way that allows for chrome like reflection, seen here on the pink part. But for the rest of the skin to work normally it needs an accordingly set up RGB map texture.

This on top of the problem that these kinds of mods of Kunos cars are not allowed here on RD - and we can't see the forum thread you linked to either without an F1 Classic account.
 
this is the tutorial:
Tools which will be handy to have them:
1A. Photoshop (Latest Releases Recommended)
1B. GIMP (If you don't have Photoshop)
2A. 3DS Max Studio (I prefer 2013 version due to my system specs)
2B. Blender (If you don't have 3DS Max Studio
3A. Content Manager (Heavily Recommended to have)
3B. ACTool's Car Manager Program (If you don't want CM)
3C. QUICKBMS with all of the AC Scripts available
4. 3DSimed
5. ksEditor (Must have)

OBJECTIVES:
- Implementing Chrome/Nickle and Carbon Fiber without losing Dirt and Damage support.
- The ability to make the Shining Effect according to preference possible at all times.
- Able to paint the whole livery skins on one template or according to its original template.

IMPORTANT:
- Using this tutorial to edit an existing car mod will risk for online compatibility, so make sure you keep in touch with your league or fellow racing online community if you want to use this to bring life into you car mods.
- Make sure you have prior permission to the original author of the car before proceeding.

//////////////////////////////////////////////

Getting the Car Mod Ready to support Chroming/Nickle/Carbon Fiber all at the same time...
Spoiler:
1. (FOR EXISTING MODS ONLY - IF NOT OR OR IF YOU DON'T WANT TO USE KSEDITOR SKIP)
- Make sure to use 3DSimed to open the KN5 file of the car mod you want it to support Chrome/Nickle and Carbon Fiber.
- Then Export it to FBX Format (Make sure you follow the options you need to set before proceeding).

IMPORTANT THINGS TO DO WHEN EXPORTING KN5 to FBX...

A. IMPORTING KN5 to 3DSIMED
YFrinVY.jpg


B. EXPORTING KN5 to FBX with 3DSIMED
cpUDowF.jpg


NOTE: You can skip exporting KN5 to FBX if you just want to directly edit the car inside 3DSimed.

//////////////////////////////////////////////

Things you need to set as the values on the paint-able parts of the Car's body...

Spoiler:
CHROME/NICKLE EFFECTS ONLY

Shader Should be: ksPerPixelMultiMap_damage_dirt

Shader Values:
UgX1adK.jpg


As for the Materials:
LEGEND FOR LABELING is (KSEDITOR/3DSIMED)

1. txDiffuse/Texture Map
- Keep this as it is, this is where the paintable skin template should be.
2. txNormal/Bump Map
- Keep this as it is (unless your mod doesn't have a damage normal mapping then use FLATNM.DDS)
3. txMaps/Diffuse Map T2
- IMPORTANT TO HAVE Will play an important role which part of your skin will use Chrome/Nickle and Carbon Fiber.
4. txDetail/Diffuse Map T3
- IMPORTANT TO HAVE Either set this to Metal_detail.DDS (Or Use MAT_CARBON.DDS if you want)
5. txDamage/Diffuse Map T4
- Keep this as it is
6. txDust/Diffuse Map T5
- IMPORTANT TO HAVE (Needs Editing on Alpha Channel to Display Properly)
7. txDamageMask/Diffuse Map T6
- Keep this as it is

IMPORTANT NOTES:
1. If you want Pure Chrome Effect (Set is Additive to 2)
2. If you want Nickle Effect (Set is Additive to 1)
3. detailUVMultiplier exact value depends on your car's UVMapping (Set it accordingly).

//////////////////////////////////////////////

How to paint your car with Chrome/Nickle Effects
Spoiler:
1. FOR SKIN LIVERY ITSELF (The Skin itself)

Enlarge this image
FEiOcgG.jpg

ALPHA CHANNEL

Enlarge this image
qpKo7nP.jpg


- Heavily Recommended to keep the Chrome's Color as Dark Grey at all times no matter how intense the Chrome/Nickle Effect is.
- Keep Carbon Fiber Part as Black
- Paint your Base Color, Decals, Logos/Sponsor as they should be (Prefer to keep them on their own exclusive Layers).
- Only Use White for Everything except for Carbon Fiber on the Alpha Channel (Carbon Fiber will always have Black).

2. FOR SKIN MAP ITSELF (Which part of the skin will use Chrome/Carbon Fiber)

Enlarge this image
Q33xoCa.jpg


- Light Green (More Shiny) Dark Green (Less Shiny)
- Light Blue (More Reflection) Dark Blue (Less Reflection)
- Keep it Dark Red for Carbon Fiber
- Do NOT use ALPHA CHANNEL for the Skin Map

Tweak Dirt Map to work properly with Chrome Effect...

Spoiler:
1. RGB Channel Should Look like this...

Enlarge this image
8PYp8NE.jpg

- Dirt should be white
- Car Clean Area should be Black

2. Alpha Channel Should Look like this...

Enlarge this image
0EJATv1.jpg

- Dirt should be white
- Car Clean Area should be Black

//////////////////////////////////////////////

BONUS SETTINGS YOU CAN DO:

Spoiler:
CHROME/NICKLE WITH CARBON FIBER EFFECTS (No DMG/No Dirt Support)

Shader Should be: ksPerPixelMultiMap

Shader Values:
zznykwA.jpg


As for the Materials:
LEGEND FOR LABELING is (KSEDITOR/3DSIMED)

1. txDiffuse/Texture Map
- Keep this as it is, this is where the paintable skin template should be.
2. txNormal/Bump Map
- Keep this as it is (unless your mod doesn't have a damage normal mapping then use FLATNM.DDS)
3. txMaps/Diffuse Map T2
- IMPORTANT TO HAVE Will play an important role which part of your skin will use Chrome/Nickle and Carbon Fiber.
4. txDetail/Diffuse Map T3
- IMPORTANT TO HAVE. Set this to MAT_Carbon.DDS
 
How about matte colors?
You can put matte colours onto any correctly made car in AC, it's part of the regular shader settings. Nowhere near as complicated as anything in this thread. Just edit the maps texture.

Also since it's 2021 not 2018, you should do chrome via CSP material replacement, not the stuff in this thread.
 
Last edited:
You can put matte colours onto any correctly made car in AC, it's part of the regular shader settings. Nowhere near as complicated as anything in this thread. Just edit the maps texture.

Also since it's 2021 not 2018, you should do chrome via CSP material replacement, not the stuff in this thread.
i approve this message
CSP allows for not editing any existing export, and can include a newly made mask etc.

http://benobro.org/sub/shade2.mp4
 
  • Deleted member 223075

For chrome i use grey paint (or something similar) plus this setting

Code:
[INCLUDE]
INCLUDE=common/materials_carpaint.ini
CarPaintVersionAware=2

[Material_CarPaint_Metallic]
FresnelMax=5
FresnelC=0.5
BrightnessAdjustment=0.9
ColoredSpecular=0.9
AmbientSpecular=0.6
AmbientSpecularEXP=5
ClearCoatThickness=0.06
CarPaintMaterial=****name of material of the car mod****

d620.jpg
 
This is great but I would love to find some documentation or examples on how to do this if possible. :) Thanks in advance!

that's my extension folder :
1612466652543.png


and that's the code to replace the skin
using some ressource file within it :

[SHADER_REPLACEMENT_...]
DESCRIPTION = skins aluminium
MATERIALS = carpaint baked
SHADER=stPerPixelMultiMap_specular
KEY_3=ksSpecularEXP
KEY_7=fresnelEXP
KEY_8=fresnelMaxLevel
VALUE_3=15
VALUE_7=4.5
VALUE_8=0.8
RESOURCE_1 = txNormal
RESOURCE_2 = txMaps
RESOURCE_4 = txSpecular
RESOURCE_FILE_1 = empty_nrm.dds
RESOURCE_FILE_2 = alu_maps.dds
RESOURCE_FILE_4 = body_specular.dds
SKINS = 40_fowler, 81_wyllys, 05_perry
 
that's my extension folder :
View attachment 442497

and that's the code to replace the skin
using some ressource file within it :

[SHADER_REPLACEMENT_...]
DESCRIPTION = skins aluminium
MATERIALS = carpaint baked
SHADER=stPerPixelMultiMap_specular
KEY_3=ksSpecularEXP
KEY_7=fresnelEXP
KEY_8=fresnelMaxLevel
VALUE_3=15
VALUE_7=4.5
VALUE_8=0.8
RESOURCE_1 = txNormal
RESOURCE_2 = txMaps
RESOURCE_4 = txSpecular
RESOURCE_FILE_1 = empty_nrm.dds
RESOURCE_FILE_2 = alu_maps.dds
RESOURCE_FILE_4 = body_specular.dds
SKINS = 40_fowler, 81_wyllys, 05_perry
Great thanks I will research this and try it out! Thanks!
 
For chrome i use grey paint (or something similar) plus this setting

Code:
[INCLUDE]
INCLUDE=common/materials_carpaint.ini
CarPaintVersionAware=2

[Material_CarPaint_Metallic]
FresnelMax=5
FresnelC=0.5
BrightnessAdjustment=0.9
ColoredSpecular=0.9
AmbientSpecular=0.6
AmbientSpecularEXP=5
ClearCoatThickness=0.06
CarPaintMaterial=****name of material of the car mod****

d620.jpg
Will this also work then for areas specified on a car?
 
Will this also work then for areas specified on a car?
No, that method is the entire car.

Also you should use FresnelC = 0.9, FresnelMax = 1.0, not those values, if you want realistic reflecting chrome.

I didn't write too detailed documentation of the version Ben posted but this covers the basics of what it's doing
Code:
body_maps.dds [txMaps]
- red = new feature control
    :  0 = reflections/specular use txSpecular
     0.5 = specular uses txSpecular
     1.0 = both unmodified)
- blue = specular/reflection sharpness
- green=reflection strength
    :  0 = no reflections
     0.5 = normal paint
     1.0 = chrome
body_specular.dds [txSpecular]
- sets the colour of the specular highlight or reflection
Uh I guess I should mention that this is just normalized rgb; 1 1 1 means 255 255 255 in a regular image editor. For plain chrome you just set red 1.0, blue 1.0, green 1.0 in the maps. For normal paint, 1.0 1.0 0.5. For metallic flake paint, 0.5 1.0 0.5 plus a body_specular.dds painted with the colour of flakes. For coloured chrome (I've mostly used this for gold/copper) red 0, blue 1, green 1 and a coloured body_specular.dds
 
Last edited:
Hey, I’m a bit late to the party, but how would I go about making certain parts of the skin chrome while leaving the rest of the skin normal? Like chrome decals?
 

Latest News

Shifting method

  • I use whatever the car has in real life*

  • I always use paddleshift

  • I always use sequential

  • I always use H-shifter

  • Something else, please explain


Results are only viewable after voting.
Back
Top