Tracks Samarkand Fantasy Circuit (title/location WIP) - First Mod

Hey all,
I've just been so inspired by the modding community here for AC that I decided I'd finally try making a mod myself. I've been drawing up a hell of a lot of fantasy tracks lately, both completely from scratch and ones that replicate real ones. Originally, this was going to be for Motorsport Manager, but (obviously, seeing as I've never done anything of the sort before) I couldn't get any further with working out how to add tracks than anyone else. As a result, I've decided to make them for here instead.
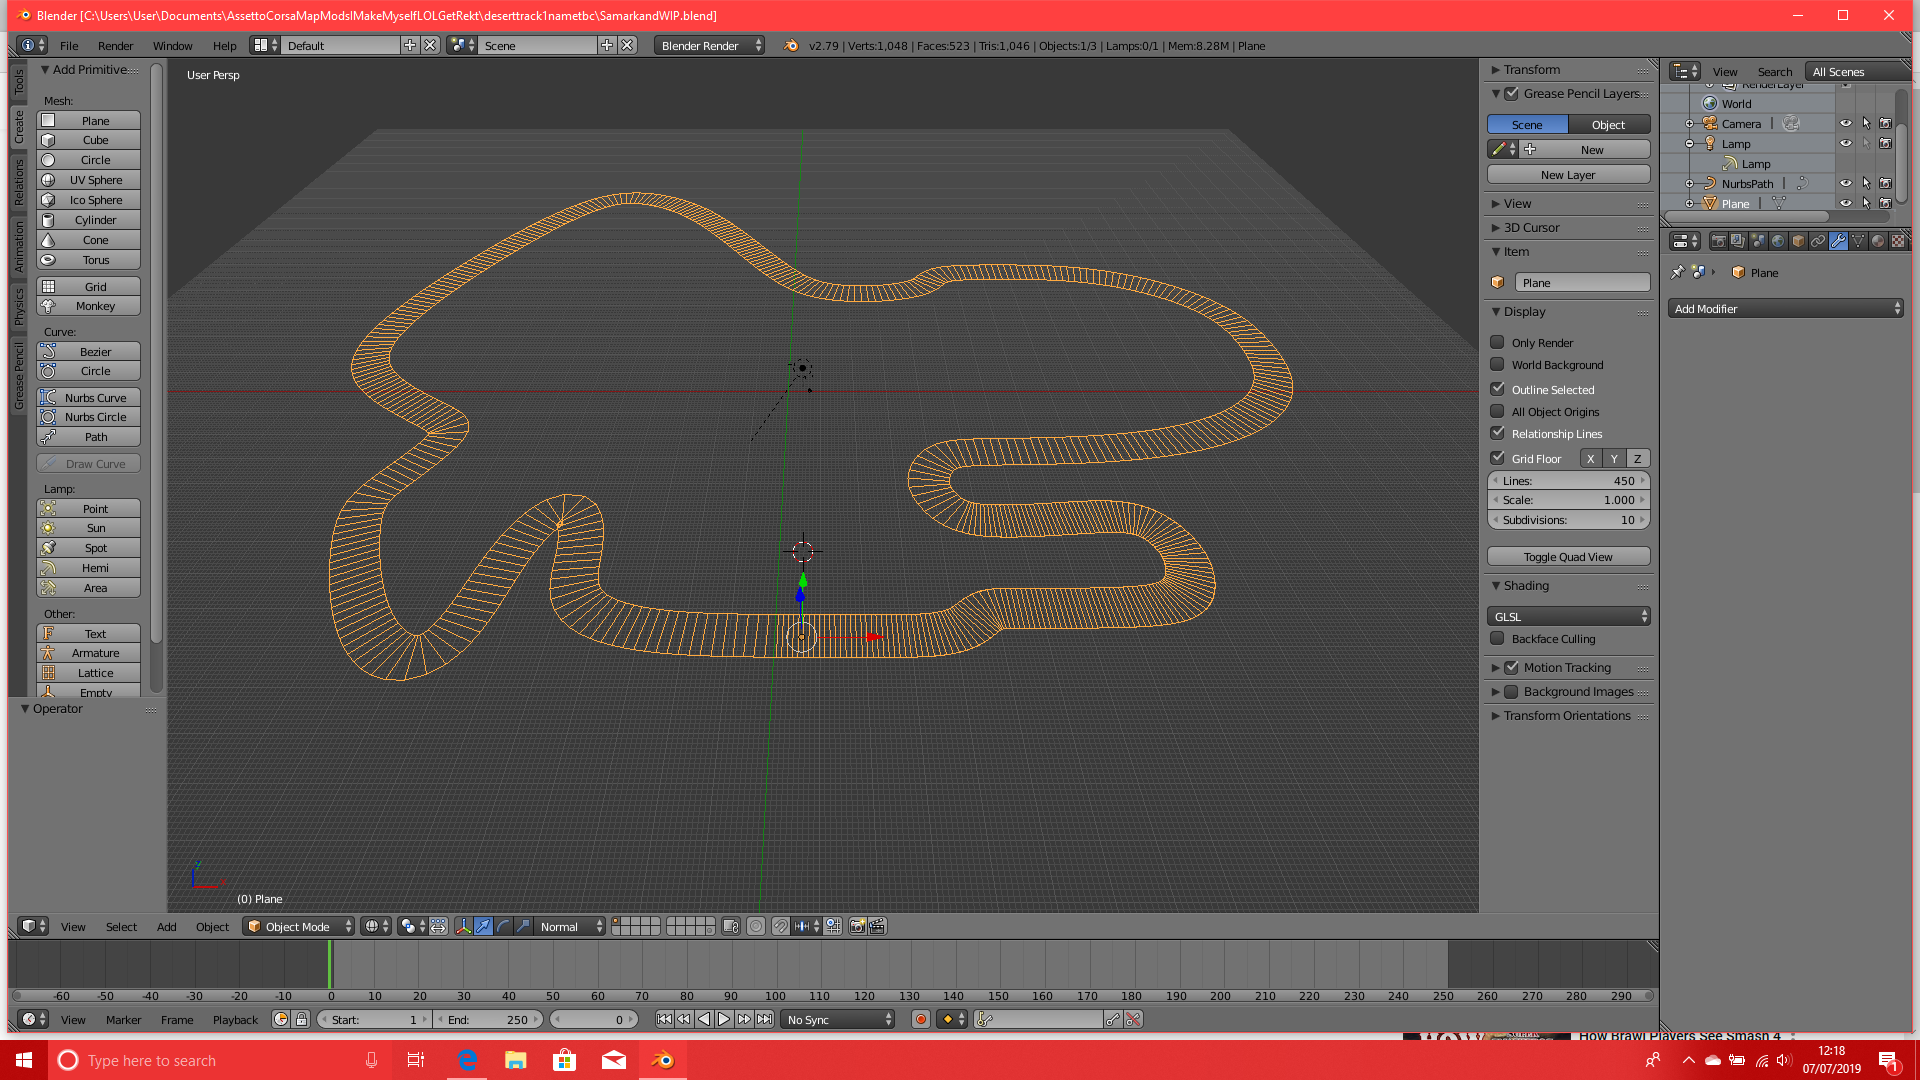
I wanted my first to not be so difficult, so a desert, away from the city or much vegetation, seemed reasonable. Here's my layout for a track that's meant to be just outside Samarkand, Uzbekistan. It's not exactly what I sketched out, but I like it.
1 - What do y'all think of the layout? I'm not far into the development so I can easily adapt it if there's a problem with it.
2 - Been following a video tutorial. Now that I'm here, what's my next step? The video I'm watching says to add 'as many loops as you need' or something, but I don't know how they did that step, even following their keystrokes etc.
Screenshot (2).png
 
When making a fictional track the only thing that matters is how it feels to drive to you. So next step would be to drive it. It looks like you have collapsed your modifiers so to edit it you'd need to redo some of the track if want to edit it later. You can keep your array and curve modifiers there and export as is and blender will collapse them during the export.

To make it drivable you need to uvmap the surface, add a material (name is enough) and then name different parts of the track according to the ac naming system. You'd also need to add couple of objects (standard blender cube is good) for things like car span position and lap time counters. There are blender tutorials that go through this whole process.
Thanks for the feedback!
Excuse me for being new, but I may need a few thing explained/defined.
'collapsed your modifiers'?
I'm following the video on how to uvmap this, but I'm not having the same result as they are. They seem to be selecting a quad (after resetting the uvmap), then right-clicking a quadrant and then selecting follow active quads. When they do this they get a repeating pattern on their uv image editor, whereas mine stays one quad. I'm not sure this is correct.
 
Exported file so far to fbx, found that the paths have no material (???), so I have them a material and now it doesn't give me an error, but still doesn't look right. It says the materials are 'NULL'. Gave them the same texture as the road and now it doesn't complain about that. Still, the editor looks like this. Mainly black. What have I not done?
 

Attachments

  • Screenshot (4).png
    Screenshot (4).png
    210.8 KB · Views: 204
Thanks for the feedback!
Excuse me for being new, but I may need a few thing explained/defined.
'collapsed your modifiers'?
I'm following the video on how to uvmap this, but I'm not having the same result as they are. They seem to be selecting a quad (after resetting the uvmap), then right-clicking a quadrant and then selecting follow active quads. When they do this they get a repeating pattern on their uv image editor, whereas mine stays one quad. I'm not sure this is correct.
Collapsing a modifier simply means that you have applied it. As for the uvmap issue. You need to unwrap the mesh first (select all, press u in 3d view or e in uvmap editor) before you can use the follow active quads. You may also need a seam if you have a closed loop that you are trying to unwrap with follow-active-quads. The seam just cuts the mesh so it can be laid into a strip. Without it it would need to curve and follow active quads don't like that. To add a seam select an edge of the road that cuts it into two and press ctrl-e and mark seam. Try follow active again.

Because you have collapsed or applied your modifiers you won't easily get a nice result with uv unwrap because the mesh is skewed so I would not really focus too much on it now. Just try to get it to load and drive first.

Exported file so far to fbx, found that the paths have no material (???), so I have them a material and now it doesn't give me an error, but still doesn't look right. It says the materials are 'NULL'. Gave them the same texture as the road and now it doesn't complain about that. Still, the editor looks like this. Mainly black. What have I not done?
You could just be looking at it from bad angle. Use the arrow keys while holding ctrl to move around and try to get above the object. You can also double click on the object name on the left side menu and the view should focus on it. By default your illumination and ppfilter settings are probably bad in the sdk. Go into the illumination in the tabs and change your weather to clear and ppfilter to natural.
 
You could just be looking at it from bad angle. Use the arrow keys while holding ctrl to move around and try to get above the object. You can also double click on the object name on the left side menu and the view should focus on it. By default your illumination and ppfilter settings are probably bad in the sdk. Go into the illumination in the tabs and change your weather to clear and ppfilter to natural.
That changed the skybox, but above and below are both still dark black, and double clicking on the object name just focuses on a point with nothing I can see on it.
Screenshot (5).png
 
Could be your scale. See that your object scale is 1 in xyz in blender. If it is something else then ctrl-a reset scale. Do you use metric, imperial or blender units inside blender?
 
Could be your scale. See that your object scale is 1 in xyz in blender. If it is something else then ctrl-a reset scale. Do you use metric, imperial or blender units inside blender?
Set it to 1 on all, only main loop needed it, not pit lane so that could no longer fit. Didn't solve problem.
Loaded up project file in blender and found the texture had been replaced by flat magenta. Presume that meant it couldn't read the file. Copied it out of the 'textures' folder closer to the blender project to see if it could read it, it could not.
Might just start over tbh. What should I remember to do next time round? Will keep using this same thread.
 
How does your fbx file look like when loaded into blender? One part of getting the models into the game is using correct fbx export settings. Here are mine:

For your next attempt. I'd make a bezier curve that creates the track layout. Set z-up and increase the resolution of that curve to 64 for example for that bezier. You can even create that bezier from your current track be selecting the middle of the track with alt-click and then press p and make new selection. Then convert that new object to bezier. Then add a plane with shift-a and add array and curve modifiers to that plane. Set the bezier as the target object for those modifiers. Make sure your origins are at 0,0,0 for all these objects and scale and rotation are 1 and 0. That gives you an easy basic road designer and editing the bezier moves the track where you need it.
 
Attempt number two, made a Bezier curve, finished the loop, no gaps or unconnected points, put in the plane, gave it array and curve modifiers and... it doesn't fit the curve. What?! What do I do? It apparently doesn't want to work now.
 

Attachments

  • Screenshot (6).png
    Screenshot (6).png
    471.2 KB · Views: 199
Attempt number two, made a Bezier curve, finished the loop, no gaps or unconnected points, put in the plane, gave it array and curve modifiers and... it doesn't fit the curve. What?! What do I do? It apparently doesn't want to work now.
control-a apply scale. Your scales for your objects are not 1,1,1. The origins also need to be in the same place. Shift-s, cursor to center, then select the bezier and the road and press shift-control-alt-c and origin to 3d cursor. Also good idea to turn on merge for the array modifier so it welds the pieces together.
 
You need to uvmap it and add a material to the object and the material then has the texture. I use cycles so I can't say how to do it in blender render but any uvmapping tutorial should show you the steps there.
 
You need to uvmap it and add a material to the object and the material then has the texture. I use cycles so I can't say how to do it in blender render but any uvmapping tutorial should show you the steps there.
Sorry I'm bothering you about this on a software you don't use. I'm really confused, I kept that in mind, but it seems like I did that and it still looks the same.
From the plane being mapped to the curve etc, I:
Added track loop edges and slid the edges back, so my plane is now segmented-ish (don't know how to describe it
Opened up a UV/Image window
Reset the UVMap, then set it to follow active quads
Added a material to the plane, reduced specular intensity to 0
Added a texture to that material, a .jpg, set it to the UV coordinates, with the map being the UVMap.
I even changed the texture and it still doesn't like it.
If you or anyone else could help that would be excellent.
Screenshot (8).png
 
Trying to apply a texture and that's not exactly worked...
It looks like that cause you have a light present in the scene, delete that and it'll show textures properly

For AC purposes the only thing you need to set up is this:
q10MUZW.png

Name the material, assign at least one material to every object, that's it. Ignore the textures tab unless you want to use the model for renders or something from blender.

The 3d view's textures get picked dependent on what you have selected in the uv map window.
6pJMhoa.png

So either go Image>Open Image... or if it's already in the list of options pick it.
 
You don't have an image in the left side window. Press open and pick the image for the texture.
Sorry I'm bothering you about this on a software you don't use. I'm really confused, I kept that in mind, but it seems like I did that and it still looks the same.
I do use blender. Blender has two rendering engines. One is blender render and the other one is cycles. I've found cycles to be easier to use. You can switch between the two from the top center drop down menu in your blender window. I'd learn cycles because it is just better and easier to use.

To add a texture in cycles you need to add material in the materials tab on the righ just like stereo showed above. Then open new viewport called node editor. By default your material has diffuse and material output. Press shift-a and add an image (texture>image texture). Point it to your texture file and connect it to the diffuse node by connecting the yellow dots. Now it should work in your 3d view if you go to textured or material view.
 
You don't have an image in the left side window. Press open and pick the image for the texture.

I do use blender. Blender has two rendering engines. One is blender render and the other one is cycles. I've found cycles to be easier to use. You can switch between the two from the top center drop down menu in your blender window. I'd learn cycles because it is just better and easier to use.

To add a texture in cycles you need to add material in the materials tab on the righ just like stereo showed above. Then open new viewport called node editor. By default your material has diffuse and material output. Press shift-a and add an image (texture>image texture). Point it to your texture file and connect it to the diffuse node by connecting the yellow dots. Now it should work in your 3d view if you go to textured or material view.
Sorry, I misunderstood that 'blender render' bit.
I might try that, thank you! Am I able to switch at this point in the project or do I need to do it again?
 
Back
Top