Show us your Rig / Cockpit

i just purchased the beginning of my simulator :)

Simulator%20Roy-1.jpg

Simulator%20Roy-2.jpg


:)
 
@ Mark & Roy: Do you want to make a new thread??

called >
Show your cockpit - Mark Renolds
Show your cockpit - Roy Visser

Then you can adjust your first post once in a while and peeps can add comments below. :D

Btw. this is also for the rest of the peeps over here.
 
My cockpit project - Mark

Using all the interior from a 90's Ford Fiesta XR2i

This setup uses the steering column found in the above car hooked up into a hidden G25 behind the fitted dashboard. On the end of the steering column I have fitted a DFP FREX quick release kit modified for the job.

Simple wooden box to hold the dash and the screen, strengthened throughout with a metal work subframe.

Steering column from the car is ball raced at each end and is now super smooth :)

Have still to fit the centre console where I shall be mounting a shifter, possibly a CST Lighting ? whatever they are called, mainly because its less of a headache than making a gear linkage to hide the G25 shifter.

All the buttons, stalks etc will be wired up to work ingame

All the dials and gauges will eventually be wired up to work aswell :)

:banana:

Click thumbs to enlarge if your that interested :)

Obviously still very much WIP !


My cockpit project - Roy

Updated 17 August

Step One
Purchase The Seat:
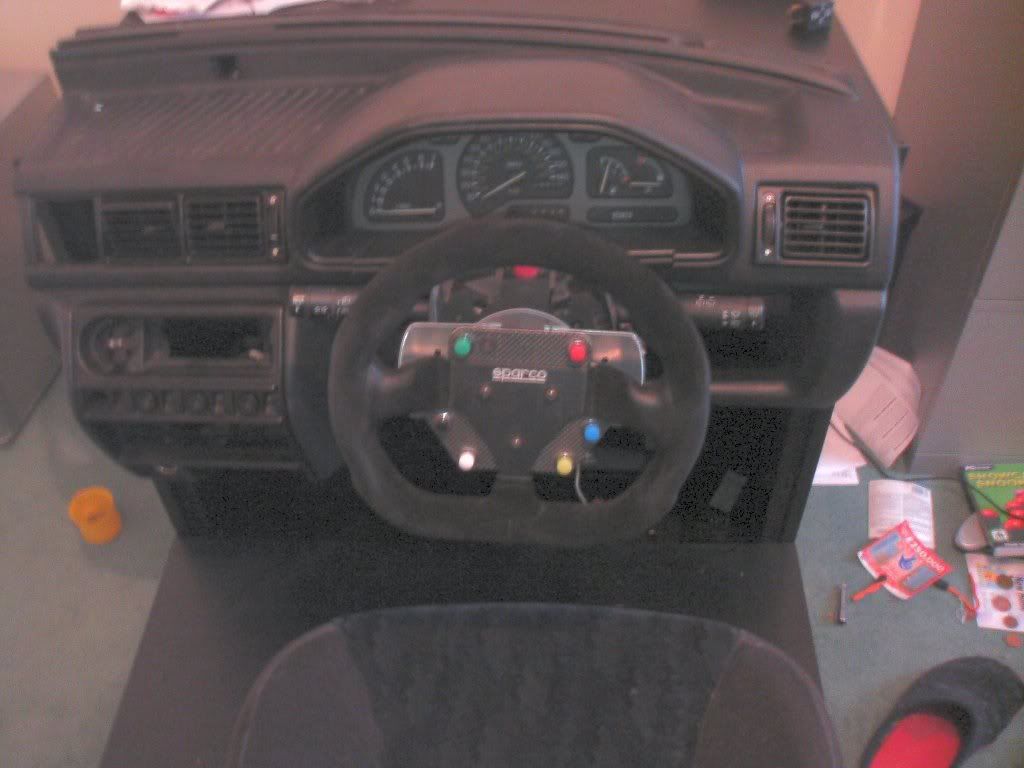
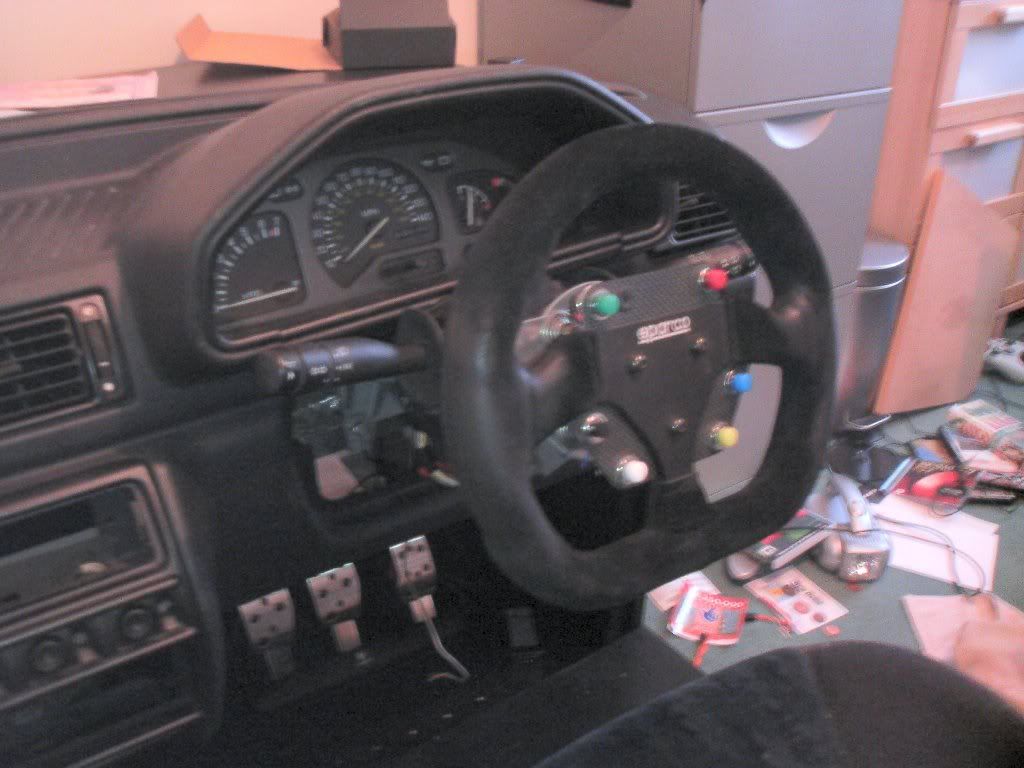
Sparco Sprint V FIA Approved
Sparco Seat Frame
Sparco Seat Slider Frame

Simulator%20Roy-1.jpg

Simulator%20Roy-2.jpg


Other Purchases:
Monitor: Samsung 225MW (due to height adjustment and design preffered over its newer brother)
Keyboard: Logitech G15 (my second one :))

Step Two
Calculate your preffered Seating position, and notate this as good as you can, with all different measurements. A good position goes a long way!!

Phase1-1.jpg

Phase1-2.jpg


btw, this is by far not the finished height of my simulator! Already added height of floor and G25 shifter position to my drawing with measurements
Step Three will have the building plans :)


(was planning on doing more today, but i had to reweld my exhaust system under my car :frusty:)

Fase2

take some wood

Phase2-1.jpg


screw it together

Phase2-2.jpg


make it look like something :)

Phase2-4.jpg


Use some sanding paper (well, allot actualy ;) ) And voila, you got a simulator!

Phase2-5.jpg


tomorrow fixing it with some bondo and base paints

and then think about a design for the side :)

Fase3!

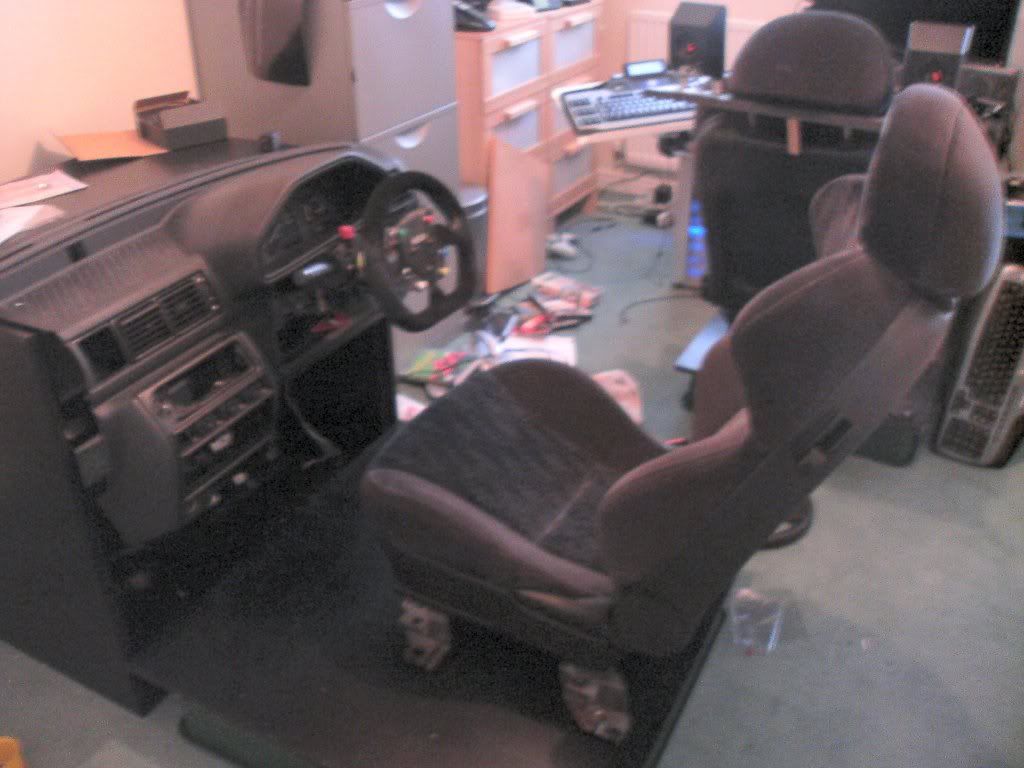
Now in my computer/multimedia room :)

Phase3-1.jpg


Phase3-2.jpg


had the first sit downs, and its perfect! If its fully installed, im never getting out of this! :D

Fase4!

Made the "casings" for the computers (one on the left of the simulator, one on the right) Had to make a door in the right one, because i would like to get behind the pc for small adjustments too :)

The "bridge" between the casing and the simulator is for wire transport, underneath the main "desk" there will be a flap with hinges so i can get to the wiring easily too!

got myself some carpet today too :D

Phase4-1.jpg


almost done!!

Phase5-1.jpg
 
  • Peter Meijer

And finally i got a decent cockpit :) Sorry for the quality of the picture.. It's made with my phone :)


Latest News

How are you going to watch 24 hours of Le Mans

  • On national tv

    Votes: 280 34.4%
  • Eurosport app/website

    Votes: 228 28.0%
  • WEC app/website

    Votes: 150 18.5%
  • Watch party

    Votes: 66 8.1%
  • At a friends house

    Votes: 20 2.5%
  • At Le Mans

    Votes: 69 8.5%
Back
Top