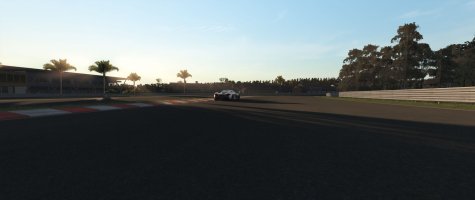
Round one: Donington Park GP 2004

General notes
This track is not the easiest to setup for. The car will require a different setup depending on where you want to be fast, so you will have to find the best compromise. Donington has some top speeds a little over 250 Km/h but it's a pretty high downforce track. The last sector i think is the crucial part of the track. It is the most difficult part and the F3000 feels quite clumsy in does slow hairpins which makes the last sector the easiest place to loose time. Here you are going to benefit from a softer car with better traction but make it to soft and it will compromise the handling in the faster parts of the track. As allways the setup is a very individual and it's best to just try different things and see which works best. But if you are unsure which way to go i think you should go for a softer more forgiving setup that provides more mechanical grip for that last sector. This means softer springs, ARB's etc. Making the rear softer then the front will help the traction out of slow corners but change the cars turn-in qualities. A softer setup will generally be easier to drive aswell.
Qualify laptime: 1,17,547
View attachment Donington Park International_090223_1356_Qualify 1,17,547.Vcr
Turn 1 "Redgate" – I use a little bit of the pit exit to position myself better for the turn but if you do that remember to be careful of the grass. The pitlane green/red lights and the blue/white striped part of the track at pit exit are pretty good for braking point referens. I start the initial braking about the same time as i start turning in. Try to be gentle on the brakes and find the right ammount of pressure and gradually ease it off. If i get in a little to slow (like in the replay) i give it a little push on the throttle and try to get as close to the curb as possible without touching it as it's very easy to spin. If you get on the curb then be very cautious with the throttle. Then i just pick up the throttle carefully, not going to full to early cuz it's easy to loose traction. If you loose traction just a little then no big a deal in qualify if you can handle it. Once the car has straightend enough and got some speed i floor the throttle and try to stay off the grass on the outside. You can also take this turn with 2nd gear if you feel it suits you and your car better.
Turn 2,3 "Hollywood" & "Craner Curves" – Easily flatout.
Turn 4 "Old Hairpin" – It's important to set yourself up for this turn but most imporant is not to over do it by taking to much curb before entering the corner. If you position yourself to much up on the curb before turning in you will spin out of control. Maybe not if you have very high ride height. Instead i try to position myself as close i can but not touching the curb The braking point is crucial to get a good entry. There are signs to give you referens but it's still not the easiest to get right. I just give the brakes a push and a downshift before turning in not to aggressivly so as to avoid oversteer and not to early on throttle either which can cause understeer and get you wide and on the grass on the exit. You might prefer to make 2 downshifts instead which will give you a little slower entry but it can feel safer. As soon as i have passed the inside curb i start to give throttle and when the car is straight enough i floor it. In my experience taking inside curb will cause oversteer so try and stay off it but more importantly if you get to high on the outside curb in the exit then be very gentle on the throttle cuz it's easy to spin with full throttle. And as you know spinning in these speeds often means heavy damage.
Turn 5,6 "Starkey's Bridge" & "Mc Lean's" – T5 is easily flat out. For T6 once again positioning is important. I try to position myself again close to the outside grass but not to close. Get one wheel on the grass during braking and you are off. The signs on the left i use for braking referens but it's easy to miss it by a couple of meters but it would not be crucial as you can just go a little wider. Same principal as in T1 i continue braking quite long into the corner and i carefully handle the throttle before i get over the little crest and feel the car is settled down before i give it full throttle. Very important not to touch the curbs on the inside as you will very easily cause oversteer. If you get on it be extremly careful on throttle or use no throttle until you are off them. Using the curb on the outside during exit is okey aslong as you stay off the grass.
Turn 7 "Coppice" – Again there are signs weel places for braking referens but the most important thing here is the initial turn-in. The turn-in here is blind which makes it quite more difficult. Don't be aggressive cuz it will make the car unsettled probably causing oversteer and compromising the exit by making you go on throttle later. Just try and be gentle and guide it in and you can take some curb as long as you are careful over it and let the car settle before you pick up the throttle. I just try to get the car pointing as straight as possible and keeping it settled so i can get on throttle asap. If i get it right i can go on full throttle almost right away and keep it flat out through the rest of the corner. Although watch out for oversteer which you can get if you steer to aggressively while flatout.
Turn 8 "Fogarty Esses" – Now begins the final and most difficult section of the track. I believe it is here most overtakings will be done. The signs on the right gives a great braking point referens so that should not be a problem. I start turning in at the 50m sign while still braking and here you need to find the ”perfect” ammount of curb to take in the entry. Take to much and the car becomes unstable and take to little you will be out of shape for the exit. For the exit i take alot of curb to get the straightest line exit line possible for maximum traction. Here it is all about having a stable settled car after having taken the curb. Take to little and you get a bad exit line and take to much the car can get unstable and you can take to much grass which will also compromise the exit. After the curb try to stabalise the car and get on full throttle asap and stay off the grass on the exit.
Turn 9 "Melbourne" – The sign on the left gives a really good brake referens and the turn is fully visible which makes T9 the easier of the 2 hairpins. The F3000 feels quite clumsy in these hairpins and it is and it's easy to loose alot of time and wear the tyres by loosing traction and sliding. It's no point trying to rush it here it will probably just make you loose more time. You are going to need good throttle control to get good traction on the exit and that should be your main focus in this corner. I would not recomend taking curb here because it's so easy to oversteer and loose alot of time. Although you can go much closer to the curb at turn-in then i do on the replay. Also loosing traction "a little" as long as you can handle it is not a big problem in qualify and usually you don't loose much time but in the race your tyres will take a beating from constantly doing that.
Turn 10 "Goddards" – The signs are there on the right for a brakepoint referens but don't work as well as for the previous hairpin. Also the turn-in is blind so you need to feel your way in. I feel that using 2nd gear here is better then 1st gear. Same as before good throttle control is very important for traction on the exit. The whole last sector especially the hairpins are probably the easiest place to loose time during the lap.
Final notes
I hope you like this track guide and find it helpful. If you have any questions feel free to ask them in the forum. Remember that this is a british track so rain is definetly a possibility. So i would recommend that you atleast try some laps in the wet just to get a feel for it so you don't panic if it actually happends during the race. It might seem near impossible to control this beast in the wet at first but just remember that smoothness and gentle driving is key. Because racing in the wet, it's all about survival....Good luck!


")