Okay so this will be a quick run through of how to make chrome paint in assetto corsa
I will note first off, this is my first ever tutorial, so it may be messy but ill make sure to get the points across. This is still very very early chrome, so take this as a rough guide but feel free to adjust settings and shaders
Tools you'll need;
photoshop (I used cs6, im assuming gimp will also work fine, I just prefer photoshop)
knowledge of how to make skins and how to change shaders as well as a decent understanding of
photoshop (magic wand tool, effects layers)
patience
Sol shaders patch for assetto (should also be on this site, if not they have a discord)
First off, you want to get photoshop and skin folders setup, usual stuff, you'll need the paint.dds and paintAO.dds files (or whatever your car material is named)
1. open up the paintAO file, create a new layer and fill it with green, set the car base layer to screen, leave the green layer as normal but drop it to about 90% opacity, you should end up with something like this
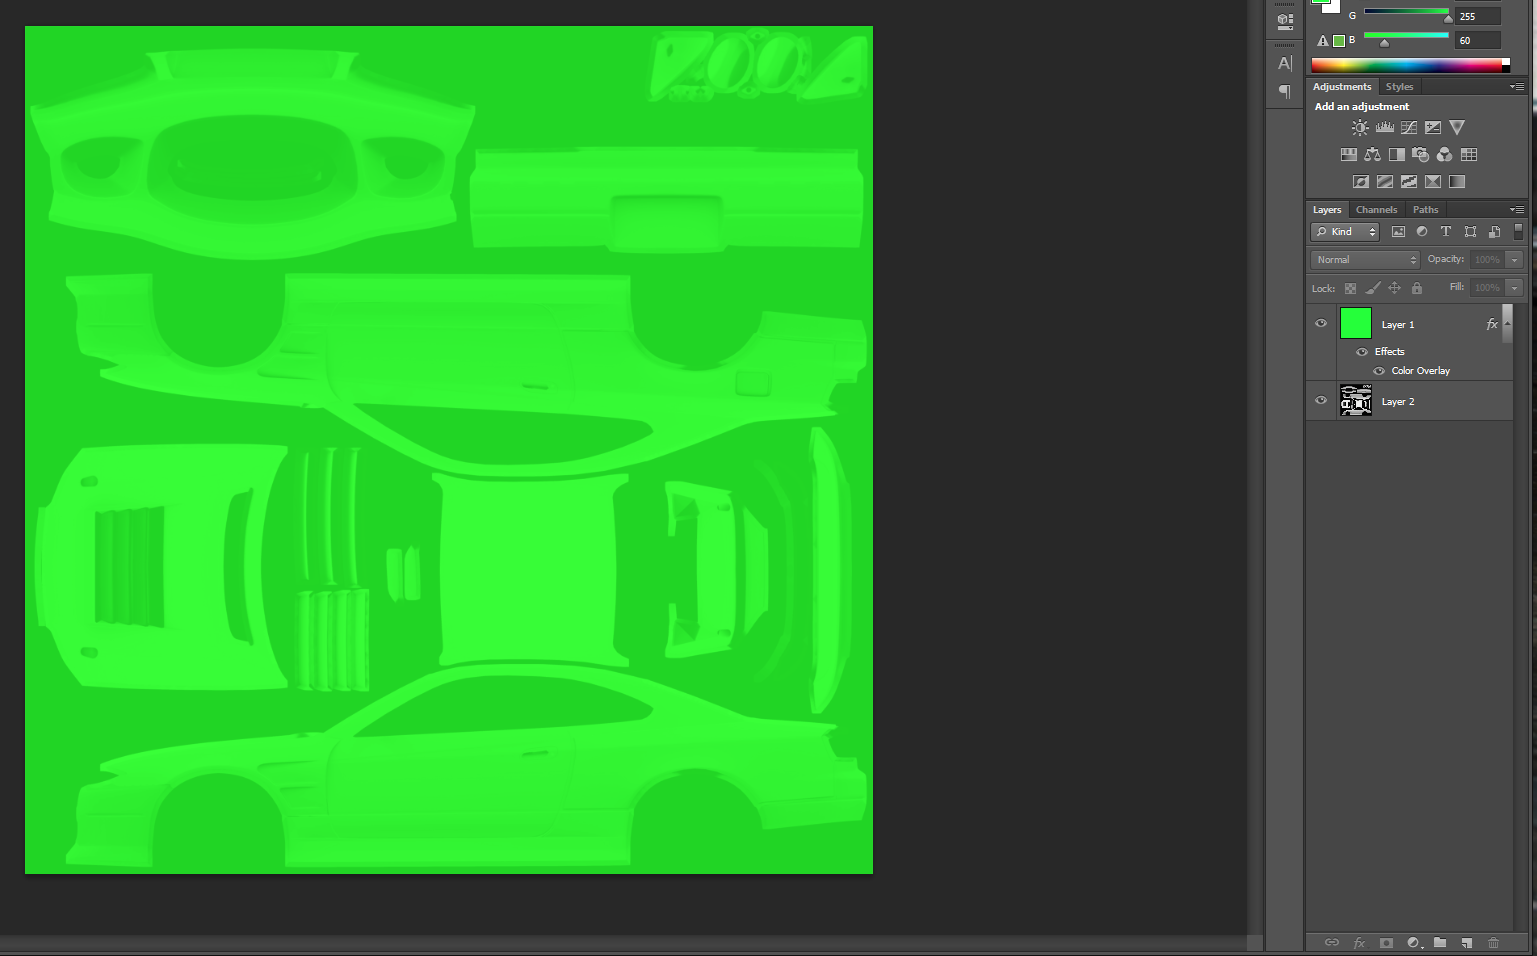
now that the AO is sorted, you can leave it alone for now. Don't close it as we'll come back to it shortly
2. open up the paint.dds file and get everything where you want it, stickers, shape work, all that fun stuff, ill use mine as an example (this is only the left side as it was early test phase)
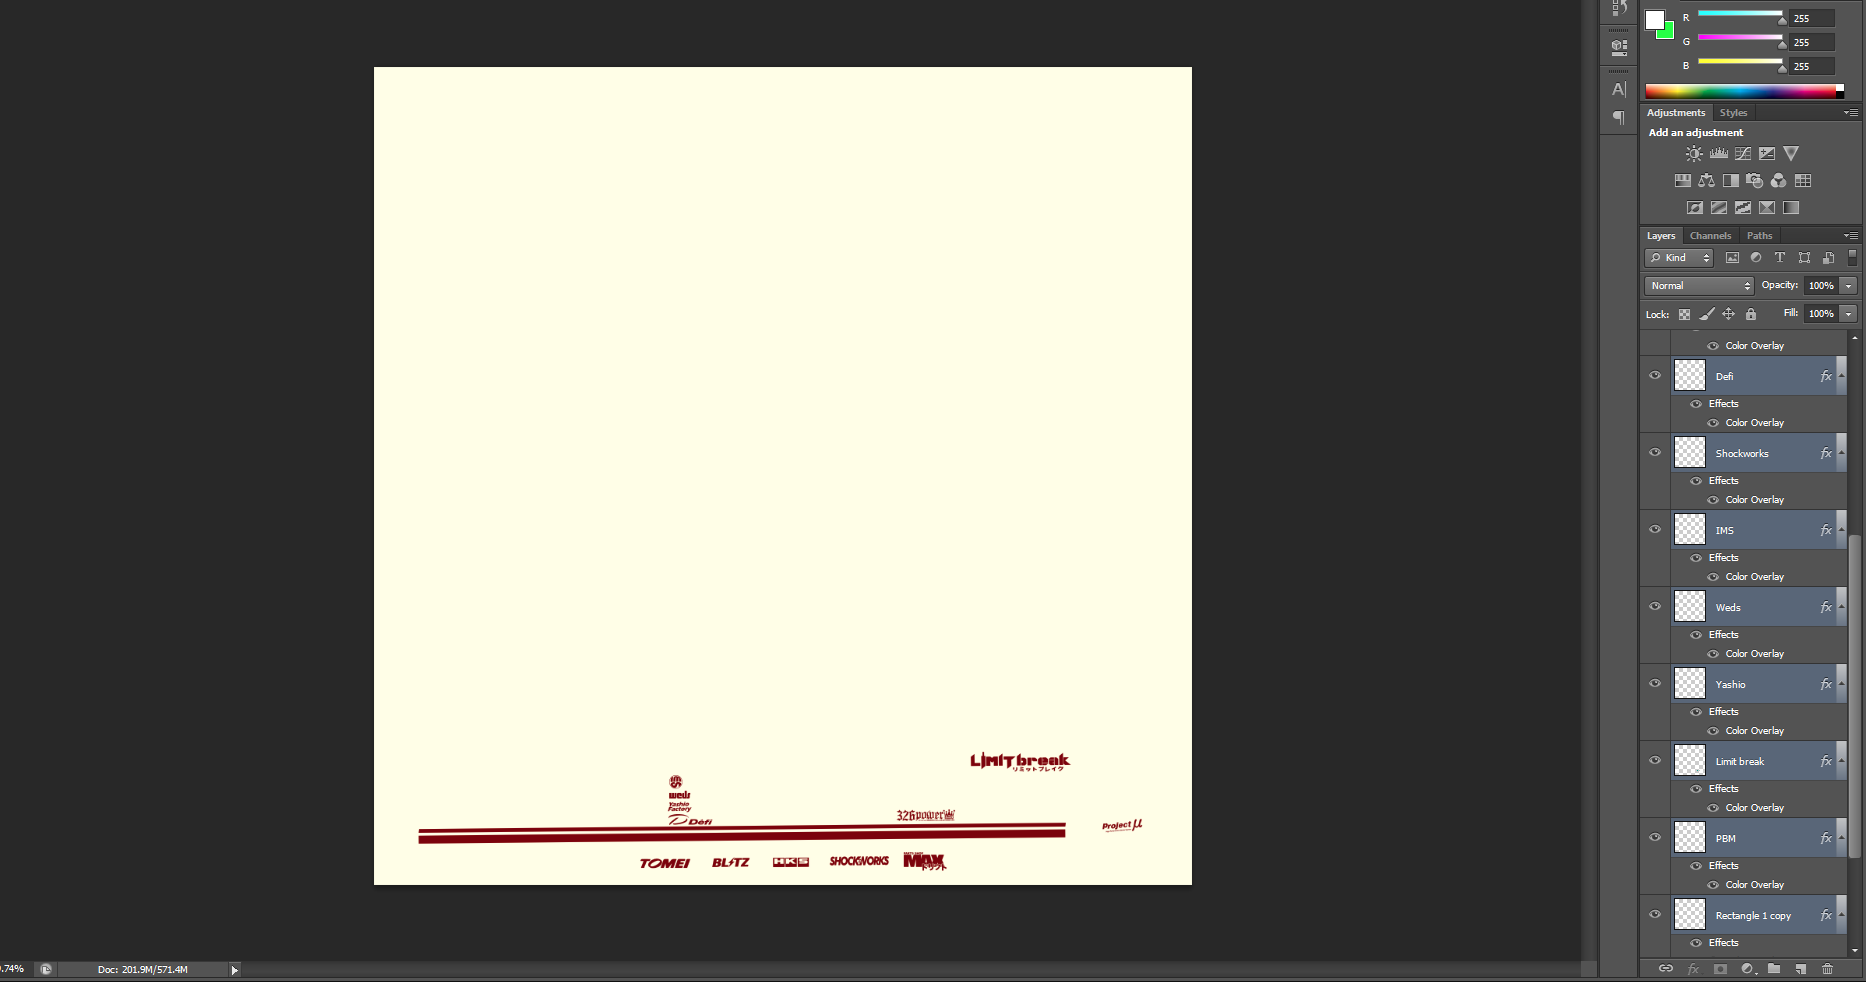
3. once you've sorted where you want everything, got colours sorted and all that fun stuff, you'll need to copy them all across to the AO. This is the important bit, once you've copied them across to the AO layer, make everything you want chrome completely white in the AO layer. I cannot stress this enough, Anything that is white and on this AO layer will be chrome. If you copy something with a stroke layer across, that stroke layer will also be chrome. (see fig a). Once you've copied things across, in the paint file, make sure to hide the car layer, so that there is nothing beneath the colour layer, use it as a template essentially to line things up on the car, but hide it once done
Also make sure that the chrome layer and the paint layers all line up, otherwise you'll have some trippy shift effect going on
On the top layer however, if you have a colour layer it will tint the chrome that colour, depending on the lighting it will make it either a light tint or a solid colour. If you want chrome WITHOUT a colour, you'll need to cut whatever it is you want out of the paint layer (fig B1) but still leave the full logo as white on the AO layer (fig B2). The example Ive used here with the parts shop max logo, the MAX in the logo will be chrome where its transparent (this is also why you have the car layer hidden within the paint.dds file) where as the part shop and characters will be a red chrome and the stroke layer will stay gloss, the AO layer still has the full logo there as I want it all chrome
Fig A
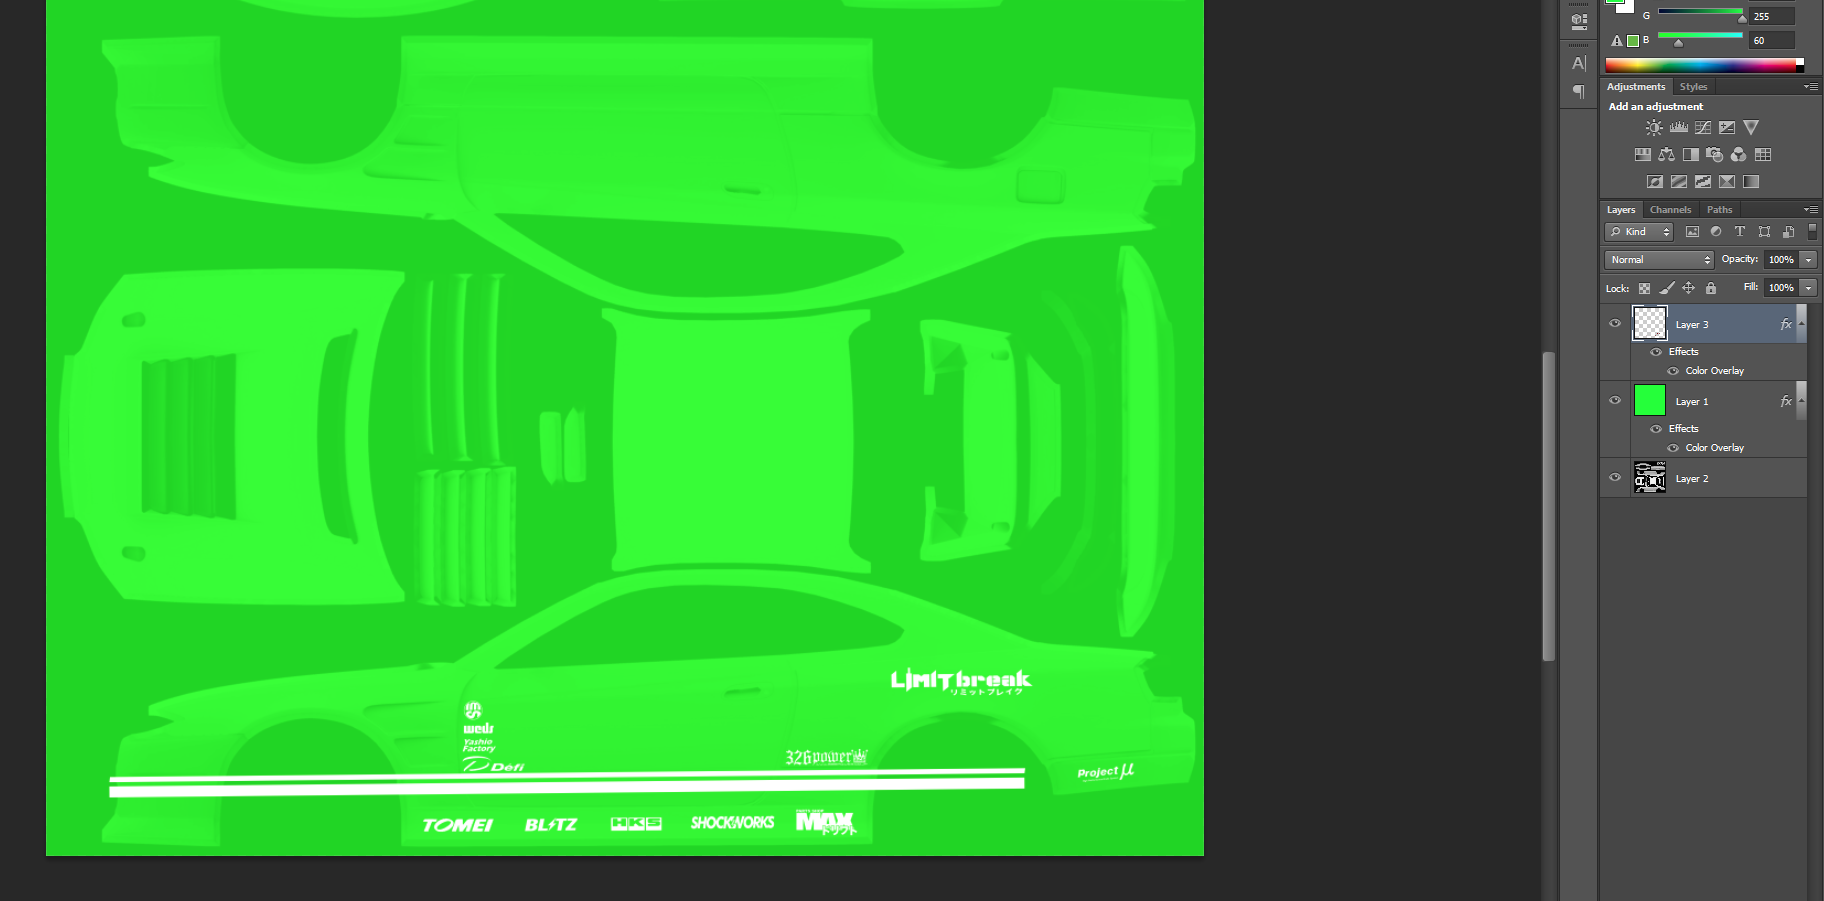
Fig B1

Fig B2

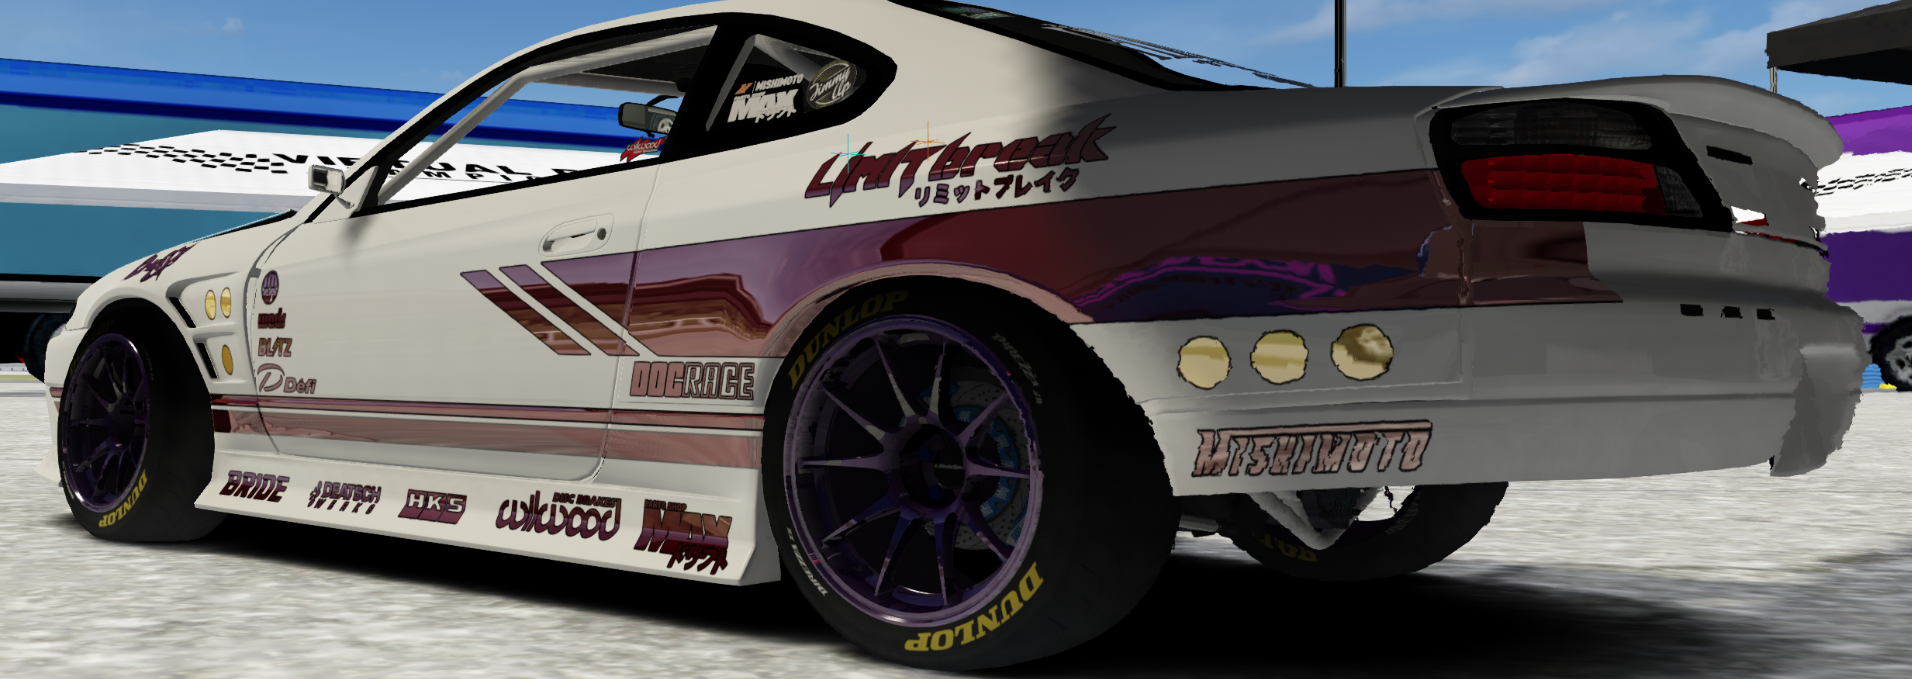
from there, if you want non chrome stroke layers, add them to the paint layer logos or shapes you want AFTER you've got them copied to the AO layer, that way the logo will be chrome, where as the stroke will stay a gloss finish as pictured best with the mishimoto logo
Side note, if you want to overlay chrome without the chrome blending everything together, use a stroke layer on the AO file but make it the same green as the base layer
So the AO looking like this
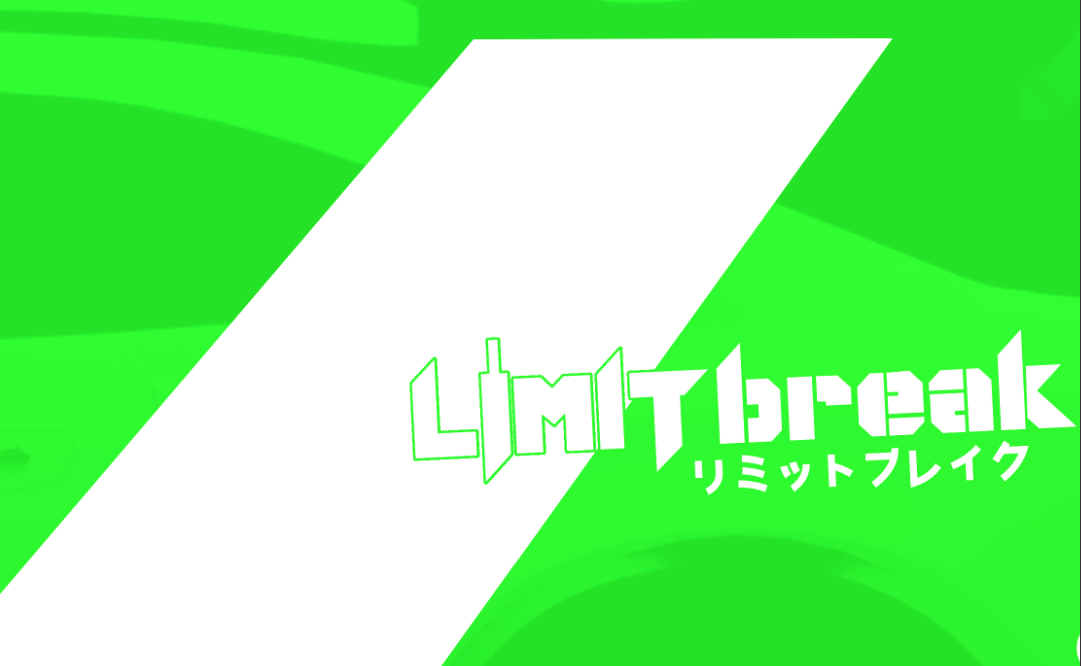
Means it will look like this in game
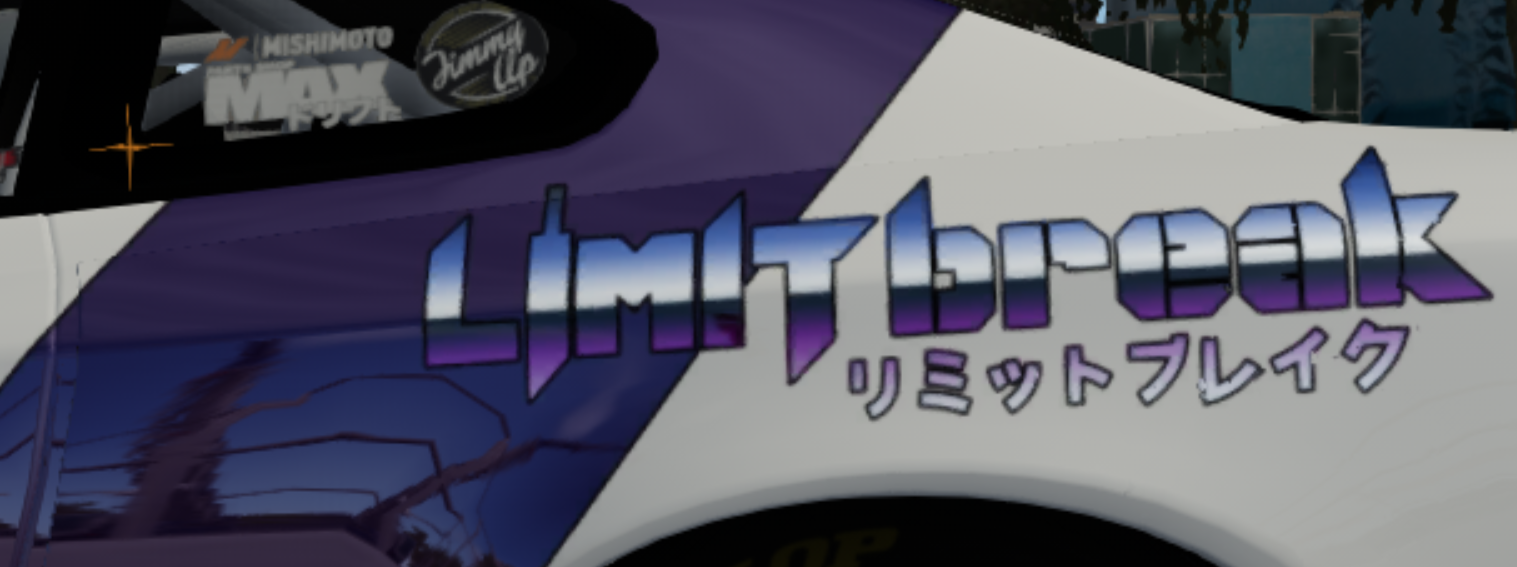
(sorry about the **** screen grab)
That way you can have chrome over chrome but it still has separation, it is a little bit tricky to get everything organised and layered correctly, which is where the patience comes in, however it becomes more and more worth it the more you see layered
once you're done, save both dds files and the paint side of things is done, from here you'll want to adjust the shaders, through CM showroom, select any panel of the body of the car and select the three dots next to material (fig C1). This will open up a sub menu which will have shader values, click change values, save the current preset (in case you want to go back to the cars stock shader) and input these parameters (fig C2). Save the preset as chrome preset or something, so that you can switch between the two and click save, your car should be all shiny and chrome now, depending on where you have the chrome
C1
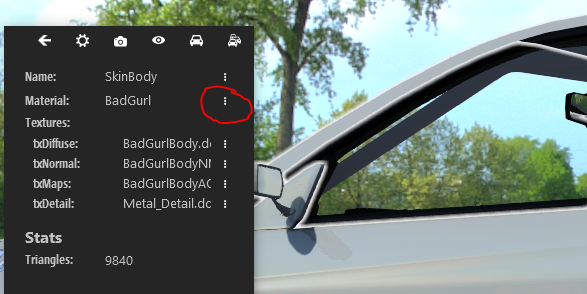
C2
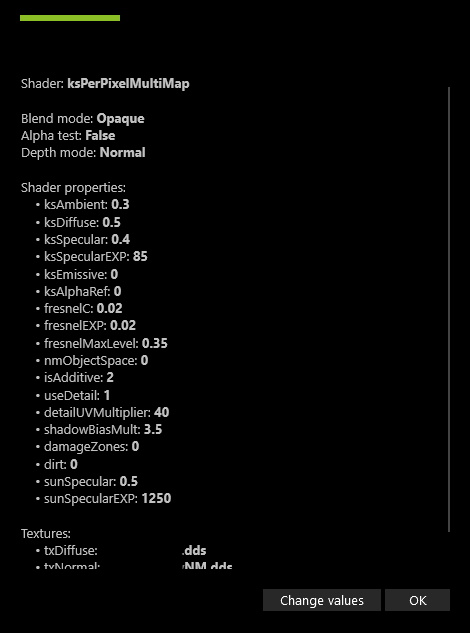
Foot note;
It will look a lot more chrome in CM showroom depending on how you have the lighting set and depending on what showrooms, in game will depend on your in game settings, these shader setting are what i feel looks good, you may find other settings or adjust to your own taste in regards to what you want to see, I also use sol shaders patch in game
Hopefully I explained everything in a way that makes sense and is easy to follow, if not let me know and ill edit it
Feel free to send in or comment pictures of your skins, I want to see what you guys can do with this!
Massive shoutout and thanks to my buddy Jello for making the shader settings and working with me to get it looking amazing, as well as my other mate James for giving me the idea and rough basework to kick start this whole adventure, if it wasn't for these two we wouldn't have chrome
I will note first off, this is my first ever tutorial, so it may be messy but ill make sure to get the points across. This is still very very early chrome, so take this as a rough guide but feel free to adjust settings and shaders
Tools you'll need;
photoshop (I used cs6, im assuming gimp will also work fine, I just prefer photoshop)
knowledge of how to make skins and how to change shaders as well as a decent understanding of
photoshop (magic wand tool, effects layers)
patience
Sol shaders patch for assetto (should also be on this site, if not they have a discord)
First off, you want to get photoshop and skin folders setup, usual stuff, you'll need the paint.dds and paintAO.dds files (or whatever your car material is named)
1. open up the paintAO file, create a new layer and fill it with green, set the car base layer to screen, leave the green layer as normal but drop it to about 90% opacity, you should end up with something like this
now that the AO is sorted, you can leave it alone for now. Don't close it as we'll come back to it shortly
2. open up the paint.dds file and get everything where you want it, stickers, shape work, all that fun stuff, ill use mine as an example (this is only the left side as it was early test phase)
3. once you've sorted where you want everything, got colours sorted and all that fun stuff, you'll need to copy them all across to the AO. This is the important bit, once you've copied them across to the AO layer, make everything you want chrome completely white in the AO layer. I cannot stress this enough, Anything that is white and on this AO layer will be chrome. If you copy something with a stroke layer across, that stroke layer will also be chrome. (see fig a). Once you've copied things across, in the paint file, make sure to hide the car layer, so that there is nothing beneath the colour layer, use it as a template essentially to line things up on the car, but hide it once done
Also make sure that the chrome layer and the paint layers all line up, otherwise you'll have some trippy shift effect going on
On the top layer however, if you have a colour layer it will tint the chrome that colour, depending on the lighting it will make it either a light tint or a solid colour. If you want chrome WITHOUT a colour, you'll need to cut whatever it is you want out of the paint layer (fig B1) but still leave the full logo as white on the AO layer (fig B2). The example Ive used here with the parts shop max logo, the MAX in the logo will be chrome where its transparent (this is also why you have the car layer hidden within the paint.dds file) where as the part shop and characters will be a red chrome and the stroke layer will stay gloss, the AO layer still has the full logo there as I want it all chrome
Fig A
Fig B1
Fig B2
from there, if you want non chrome stroke layers, add them to the paint layer logos or shapes you want AFTER you've got them copied to the AO layer, that way the logo will be chrome, where as the stroke will stay a gloss finish as pictured best with the mishimoto logo
Side note, if you want to overlay chrome without the chrome blending everything together, use a stroke layer on the AO file but make it the same green as the base layer
So the AO looking like this
Means it will look like this in game
(sorry about the **** screen grab)
That way you can have chrome over chrome but it still has separation, it is a little bit tricky to get everything organised and layered correctly, which is where the patience comes in, however it becomes more and more worth it the more you see layered
once you're done, save both dds files and the paint side of things is done, from here you'll want to adjust the shaders, through CM showroom, select any panel of the body of the car and select the three dots next to material (fig C1). This will open up a sub menu which will have shader values, click change values, save the current preset (in case you want to go back to the cars stock shader) and input these parameters (fig C2). Save the preset as chrome preset or something, so that you can switch between the two and click save, your car should be all shiny and chrome now, depending on where you have the chrome
C1
C2
Foot note;
It will look a lot more chrome in CM showroom depending on how you have the lighting set and depending on what showrooms, in game will depend on your in game settings, these shader setting are what i feel looks good, you may find other settings or adjust to your own taste in regards to what you want to see, I also use sol shaders patch in game
Hopefully I explained everything in a way that makes sense and is easy to follow, if not let me know and ill edit it
Feel free to send in or comment pictures of your skins, I want to see what you guys can do with this!
Massive shoutout and thanks to my buddy Jello for making the shader settings and working with me to get it looking amazing, as well as my other mate James for giving me the idea and rough basework to kick start this whole adventure, if it wasn't for these two we wouldn't have chrome
Last edited:
