RaceDepartment Historic Grand Prix Season 8 Round 8
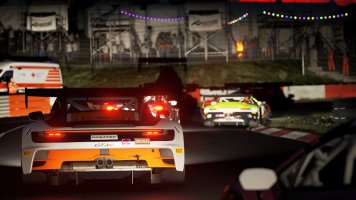
Welcome back to Round 8 of the RDHGP S8, and the final event of the season. I feel quite pleased with how Gellerasen went, feedback was mostly positive about the track and how it drove. We get quite a contrast going from the shortest track of the season to the longest, and a huge change in character as well.
As is customary, this is a double length, weekend run event. In case anyone doesn’t know, we run this on a weekend to allow timezones ahead of GMT to not be as adversely affected during the working/school week. The 200km distance means that all bar one of the League vehicles must stop for fuel to make the end of the race, and then there is the factor of new tyres being available. Some may opt to not stop and nurse the car through to the end, some will opt for fuel only to shorten the stop and have to nurse the tyres that need to go twice as far as a normal League race, and the rest will take both fuel & tyres and be able to push as hard as a normal 100km race. It’s always a fine balancing act between the strategies and it throws up some unusual battles as people encounter people on different strategies throughout the course of the race.
Round 8 takes us 1040 miles due South from Karlskoga in Sweden to Northern Italy, and the Autodromo Enzo e Dino Ferrari in Imola.

Circuit Notes
Situated 40km East of Bologna, the circuit was originally named for Enzo Ferrari’s late son Dino who died in the 1950’s, but then he himself was added after his death in 1988. Imola held the San Marino Grand Prix for many years, and ran the 1980 iteration of the Italian Grand Prix while Monza was undergoing refurbishment. It is one of few major international circuits to run in an anti-clockwise direction.
The 500lb gorilla in the corner that no-one wants to mention is the meeting in 1994 where Rubens Barrichello was injured in Friday Practice, Roland Ratzenberger was killed in Saturday Qualifying, and Ayrton Senna was killed during the race on Sunday.
In 2007 the circuit was dropped from the F1 Calendar, but it has now been reconstructed and is beginning to host major events again having been given the “1” rating from the FIA. No F1 has yet been announced, but the Le Mans Series 6 Hours of Imola is a step in the right direction.
A lap of Imola starts on the long S/F straight, through the gentle curve just past the line, allowing the cars to get up a good head of steam, even on the opening lap, so we should see some separation by the time we stand on the brakes for the first complex – Tamburello.
T1aL is protected on the inside by tyre pillars, and on the outside by a slippery sand trap. This is one of the corner complexes where it pays to take your medicine in this first section. Once through the first part, you can get gently on the accelerator and then feather for T1bR, again avoiding the potentially race-ending tyre barrier on the inner apex guarding the cut. Once out of here, and pointing in roughly the right direction, get aggressively on the throttle and sweep through T1cL under full gas, and out onto the straight beyond.
After the decent length straight you approach the next corner, which is a bit more of a classical -but widely spaced- left-right chicane – Villeneuve. Hard on the brakes for T2aL, enter it from as wide as possible, carrying some speed through the first part, and then a dab of brakes for T2bR, and then try not to drift too far left on the exit, as the kerb is slippery, and the grass beyond it won’t slow you in time to prevent you hitting the fence beyond.
Accelerate hard out of Villeneuve, under the footbridge, and then stand on the brakes hard for T3L – Tosa. A slow tight turn, braking distances and lines will be very varied, so caution needed through here. It exits uphill, and is quite slippery, so care is required when to stand on the accelerator, especially when your tyres are worn.
Hard on the gas once you are settled, uphill and keeping right over the blind crest, and then brake for T4L – Piratella. A double apexed, medium speed corner in which the outer edge on the first apex is guarded by sandy grass and a close wall, and the inside kerbs on the second apex are bumpy. Get this corner right, and you can head onto the downhill straight that follows with a big old smile on your face.
Hammering downhill you see the next corner ahead - T5R - and as it’s a downhill entry you’ll need to brake earlier and longer than normal, drop a gear, throw the nose across the apex, and then stand hard again on the brakes and get settled for T6R – Acque Minerale.
Acque Minerale is tight, the turn apex is at the bottom of the dip, and it exits steeply uphill. Get the nose in as tight as possible, do your turning, and then get on the gas on the way out, trying not to slither across the bumpy kerbs and run off areas – which incidentally are NOT considered racing surface.
Full acceleration up the hill, and over the gentle crest as the track flattens out, going under the trees until you hit the hard braking point for Variante Alta. A close, classic chicane, get your braking done well enough to flick the nose right into the T7aR first section, avoid the car unsettling kerbs, flick it back left again almost immediately through T7bL, and then squeeze on the power through the exit, avoiding running wide over some more nasty kerbs and onto the downhill straight that follows.
Keep hard on the gas down hill, take the right-hander curve that goes under the bridge, and then get hard, hard on the brakes for the tricky Rivazza.
Rivazza is another double apex turn, with the topography making them very different. The high speed downhill approach to T8aL extends the braking zone, the off camber profile makes it difficult to get the nose in, and the bumpy kerb and waiting , slippery grass on the exit need to be factored in as well. Get through there safely, and the entire character of the section changes. You can be aggressive through T8bL, taking a late apex and stamping on the gas onto the uphill straight that it opens onto.
Hard acceleration uphill, round the slight right-hand curve that then flattens before you get hard on the brakes again. Carrying straight on, you have the pit entry, which is actually quite a fast approach. Before that though, and guarded by tyre bales and aggressive cut warnings, you have the final turn – Variante Bassa.
Brake early for T9aL, and get off the brakes early as well, to make sure that you make the turn nice and tight around the inner tyres. Flick the nose right for T9bR, avoiding the inner tyres, squeezing on the gas, trying not to drift too wide across the kerb and into the Cut Warning, and hit the S/F line at almost full chat and another lap of Imola.
Just a reminder that this 200km finale is this coming Saturday 4th Feb
Welcome back to Round 8 of the RDHGP S8, and the final event of the season. I feel quite pleased with how Gellerasen went, feedback was mostly positive about the track and how it drove. We get quite a contrast going from the shortest track of the season to the longest, and a huge change in character as well.
As is customary, this is a double length, weekend run event. In case anyone doesn’t know, we run this on a weekend to allow timezones ahead of GMT to not be as adversely affected during the working/school week. The 200km distance means that all bar one of the League vehicles must stop for fuel to make the end of the race, and then there is the factor of new tyres being available. Some may opt to not stop and nurse the car through to the end, some will opt for fuel only to shorten the stop and have to nurse the tyres that need to go twice as far as a normal League race, and the rest will take both fuel & tyres and be able to push as hard as a normal 100km race. It’s always a fine balancing act between the strategies and it throws up some unusual battles as people encounter people on different strategies throughout the course of the race.
Round 8 takes us 1040 miles due South from Karlskoga in Sweden to Northern Italy, and the Autodromo Enzo e Dino Ferrari in Imola.
Circuit Notes
Situated 40km East of Bologna, the circuit was originally named for Enzo Ferrari’s late son Dino who died in the 1950’s, but then he himself was added after his death in 1988. Imola held the San Marino Grand Prix for many years, and ran the 1980 iteration of the Italian Grand Prix while Monza was undergoing refurbishment. It is one of few major international circuits to run in an anti-clockwise direction.
The 500lb gorilla in the corner that no-one wants to mention is the meeting in 1994 where Rubens Barrichello was injured in Friday Practice, Roland Ratzenberger was killed in Saturday Qualifying, and Ayrton Senna was killed during the race on Sunday.
In 2007 the circuit was dropped from the F1 Calendar, but it has now been reconstructed and is beginning to host major events again having been given the “1” rating from the FIA. No F1 has yet been announced, but the Le Mans Series 6 Hours of Imola is a step in the right direction.
A lap of Imola starts on the long S/F straight, through the gentle curve just past the line, allowing the cars to get up a good head of steam, even on the opening lap, so we should see some separation by the time we stand on the brakes for the first complex – Tamburello.
T1aL is protected on the inside by tyre pillars, and on the outside by a slippery sand trap. This is one of the corner complexes where it pays to take your medicine in this first section. Once through the first part, you can get gently on the accelerator and then feather for T1bR, again avoiding the potentially race-ending tyre barrier on the inner apex guarding the cut. Once out of here, and pointing in roughly the right direction, get aggressively on the throttle and sweep through T1cL under full gas, and out onto the straight beyond.
After the decent length straight you approach the next corner, which is a bit more of a classical -but widely spaced- left-right chicane – Villeneuve. Hard on the brakes for T2aL, enter it from as wide as possible, carrying some speed through the first part, and then a dab of brakes for T2bR, and then try not to drift too far left on the exit, as the kerb is slippery, and the grass beyond it won’t slow you in time to prevent you hitting the fence beyond.
Accelerate hard out of Villeneuve, under the footbridge, and then stand on the brakes hard for T3L – Tosa. A slow tight turn, braking distances and lines will be very varied, so caution needed through here. It exits uphill, and is quite slippery, so care is required when to stand on the accelerator, especially when your tyres are worn.
Hard on the gas once you are settled, uphill and keeping right over the blind crest, and then brake for T4L – Piratella. A double apexed, medium speed corner in which the outer edge on the first apex is guarded by sandy grass and a close wall, and the inside kerbs on the second apex are bumpy. Get this corner right, and you can head onto the downhill straight that follows with a big old smile on your face.
Hammering downhill you see the next corner ahead - T5R - and as it’s a downhill entry you’ll need to brake earlier and longer than normal, drop a gear, throw the nose across the apex, and then stand hard again on the brakes and get settled for T6R – Acque Minerale.
Acque Minerale is tight, the turn apex is at the bottom of the dip, and it exits steeply uphill. Get the nose in as tight as possible, do your turning, and then get on the gas on the way out, trying not to slither across the bumpy kerbs and run off areas – which incidentally are NOT considered racing surface.
Full acceleration up the hill, and over the gentle crest as the track flattens out, going under the trees until you hit the hard braking point for Variante Alta. A close, classic chicane, get your braking done well enough to flick the nose right into the T7aR first section, avoid the car unsettling kerbs, flick it back left again almost immediately through T7bL, and then squeeze on the power through the exit, avoiding running wide over some more nasty kerbs and onto the downhill straight that follows.
Keep hard on the gas down hill, take the right-hander curve that goes under the bridge, and then get hard, hard on the brakes for the tricky Rivazza.
Rivazza is another double apex turn, with the topography making them very different. The high speed downhill approach to T8aL extends the braking zone, the off camber profile makes it difficult to get the nose in, and the bumpy kerb and waiting , slippery grass on the exit need to be factored in as well. Get through there safely, and the entire character of the section changes. You can be aggressive through T8bL, taking a late apex and stamping on the gas onto the uphill straight that it opens onto.
Hard acceleration uphill, round the slight right-hand curve that then flattens before you get hard on the brakes again. Carrying straight on, you have the pit entry, which is actually quite a fast approach. Before that though, and guarded by tyre bales and aggressive cut warnings, you have the final turn – Variante Bassa.
Brake early for T9aL, and get off the brakes early as well, to make sure that you make the turn nice and tight around the inner tyres. Flick the nose right for T9bR, avoiding the inner tyres, squeezing on the gas, trying not to drift too wide across the kerb and into the Cut Warning, and hit the S/F line at almost full chat and another lap of Imola.
Just a reminder that this 200km finale is this coming Saturday 4th Feb

")