The SimFeedback-AC DIY Motion Simulator thread

Hey guys. Thought I’d create a thread for those taking the plunge into this brilliant DIY project..
I will be starting mine soon and I know there are others thinking about it.. so feel free to share your knowledge and experiences so we can all enjoy this platform to its full potential. A huge thanks to the developers who have really knocked this one out of the park!

Website: https://opensfx.com/2019/02/20/welcome-to-our-new-site/

Github: https://github.com/SimFeedback/SimFeedback-AC-Servo/wiki

For all the internals for the actuator contact Amy - skye@ntl-bearing.com
She can supply everything you need. Just remind her you want the ends of the shafts chamfered and make sure she sends the right sized ball screw - we have had a couple of issues reported. She is very helpful though and the cost is pretty good.


Huge thanks to @RowanH for writing a comprehensive user guide which can be accessed here - https://www.rowanhick.com/sfx-100-build-and-running-guide

In addition, @anton_Chez has contributed a list of post numbers for some of the important settings etc..
Post #320 SFX-100 thread
Post #327 SFX-100 thread for Discord correlation
Post #339 SFX-100 thread
Post #418 SFX-100 thread
Post #424 SFX-100 thread
Post #439 SFX-100 thread
Post #449 SFX-100 thread
Post #517 SFX-100 thread
Post #554 SFX-100 thread
Post #580 SFX-100 thread
Post #826 SFX-100 thread
Post #837 SFX-100 thread
Post #864,866,867,868,870,887,889,897 SFX-100 thread
Post #911,914 SFX-100 thread
Post #988,992,998 SFX-100 thread
Post #1147 SFX-100 thread
Post #1492 SFX-100 thread
Post #1511,1517 SFX-100 thread

I will try to keep this page updated with links to source the parts in other parts of the world. Just post whatever links you have and i'll add them here.

Please note: Not all the parts listed below are essential for the project. For the essential parts refer to the original shopping list.

Australia:

Thanks to @AussieSim for the following links:

10A power lead(s) * 4
https://www.jaycar.com.au/2m-black-mains-extension-lead/p/PS4152

Top quality wire stripper
https://sydneytools.com.au/product/boxo-cutws205-multifunction-wire-stripper

RCD/safety switch power block
https://www.bunnings.com.au/arlec-4-outlet-heavy-duty-portable-safety-switch_p4420028

WD-40 lithium grease for the ball screws
https://www.bunnings.com.au/wd-40-specialist-300g-high-performance-white-lithium-grease_p6100408

Vibration pads
https://www.bunnings.com.au/whites-on-site-100-x-12-5mm-rubber-anti-vibration-mat-4-pack_p3961547

WD-40 Dry PTFE spray for the slider (free shipping)
https://au.rs-online.com/mobile/p/lubricants/7577134/

Arduino Leonardo (free shipping + frequent 10-15% off discount)
https://www.arrow.com/en/products/a000057/arduino-corporation

DB25 cables * 4 (free shipping)
https://www.arrow.com/en/products/ak401-2/assmann-wsw-components-inc

PETG * 3 (free shipping)
https://www.arrow.com/en/products/petg17bk1/mg-chemicals

WAGO-like connectors to avoid a breadboard (perhaps use genuine ones if you are doing 240V AC)
https://www.aliexpress.com/item/32906719488.html

D-Sub breakout boards * 4
https://www.aliexpress.com/item/32297675967.html

3D printer Creality Ender-3 Pro
https://www.aliexpress.com/item/32918302452.html

Wires from Arduino to D-Sub breakout (remove black plastic from the WAGO end)
https://www.aliexpress.com/item/32887680826.html

Crimp connectors for AC wire leads
https://www.aliexpress.com/item/32813550981.html
 
Last edited by a moderator:
messy initial 120x40 build, need to
  • re attach shakers(im missing these effects) and wind
  • drill, spray, mount sandwich plates
  • foot plate
  • cables
  • end caps
  • tweak and race
  • list never ends ;)
  • BIG THANK YOU to everyone that's helped and inspired this build
Webp.net-resizeimage.jpg

4prM8KW
 
Last edited:
Upvote 0
How to print SFX parts in under 100 hours

I've been experimenting with settings to reduce the print time for SFX parts. [For those unaware, I've been printing many of these sets, see details in the marketplace section, as I've been doing this as a free service for the community].

Anyway, after literally thousands of hours of printing, I've found a way to use a 0.6mm nozzle to get gorgeous prints that are stronger than the original, and take half the time to print. Here's the final result. This piece normally takes about 11 hours to print with normal settings (0.4mm nozzle, 8 perimeters, 12 top/bottom layers, 20% infill). I printed this in less than 5 hours:


This part is stronger than the stock parts, a natural consequence of a thicker extrusion, larger layer height, and use of 25% (compared to 20%) infill. To achieve this you really have to know your printer and slicer. Here's details on how to get this result.

First, you need a well-calibrated printer. You want it square (no skew), a level bed, and a very well calibrated extruder. All of these things are outside the scope of this note; you can google to get all of these things tuned on your particular printer.

For the SFX parts, you have a few considerations. A big issue is warping. To prevent this, I print with a 5mm, single layer height brim. Also, I've found printing the first layer at half the height of subsequent layers dramatically improves bed adhesion, reduces warpage, and gives a nice, cosmetic result. Plus, the brim will be fairly thin and easy to remove at this setting.

Here's the basic settings for a 0.6mm nozzle. You'll have to find the places in your slicer program to update these:

0.6mm nozzle profile (be sure to change to the whole profile, not just the nozzle diameter)
0.4 mm layer height
0.2 mm minimum layer height (for variable layers, see below)
0.2 mm first layer height
5 perimeters
8 top/bottom layers
25% infill, grid pattern
solid infill every 20 layers
perimeter start point: random
0.5mm brim, single layer high
variable layer height for the top 3mm of the print down to 0.2mm

The last requirement here is optional. Your slicer may not support this. You want the ability to have variable layer height, and set the last (top) 3mm of your print back to a 0.2mm layer. This wil print a very nice edge on the linear bearing (see picture, above) as well as give a very smooth, cosmetic infill on the top that you can see in the pic as well. If you do use variable layer height, you may want to set the number of "top" layers to 12, to compensate for the thinner layers this will print. Variable layer height is an advanced feature, and you'll have to read your slicer manual for specifics. Once you have all these settings, slice your STL file, and print away.

A couple of other comments. I printed all my bumpstops and sliders with the 0.4mm nozzle. I've not tried these 0.6mm nozzles with the sliders; this is the most sensitive part to variation in dimensions, and once I dialed one of my printers for sliders, I've used that ever since. You can try a 0.6mm nozzle on the slider, but be prepared to have to tune things to get a good, tight fit in the extrusion.

These changes will reduce the printing time for a full set of parts from 220 to about 100 hours. Good luck, and let me know if you have any further questions.


Prints look super clean. Layer adhesion looks immaculate.
Have you managed to test the strength as a comparison?
 
Upvote 0
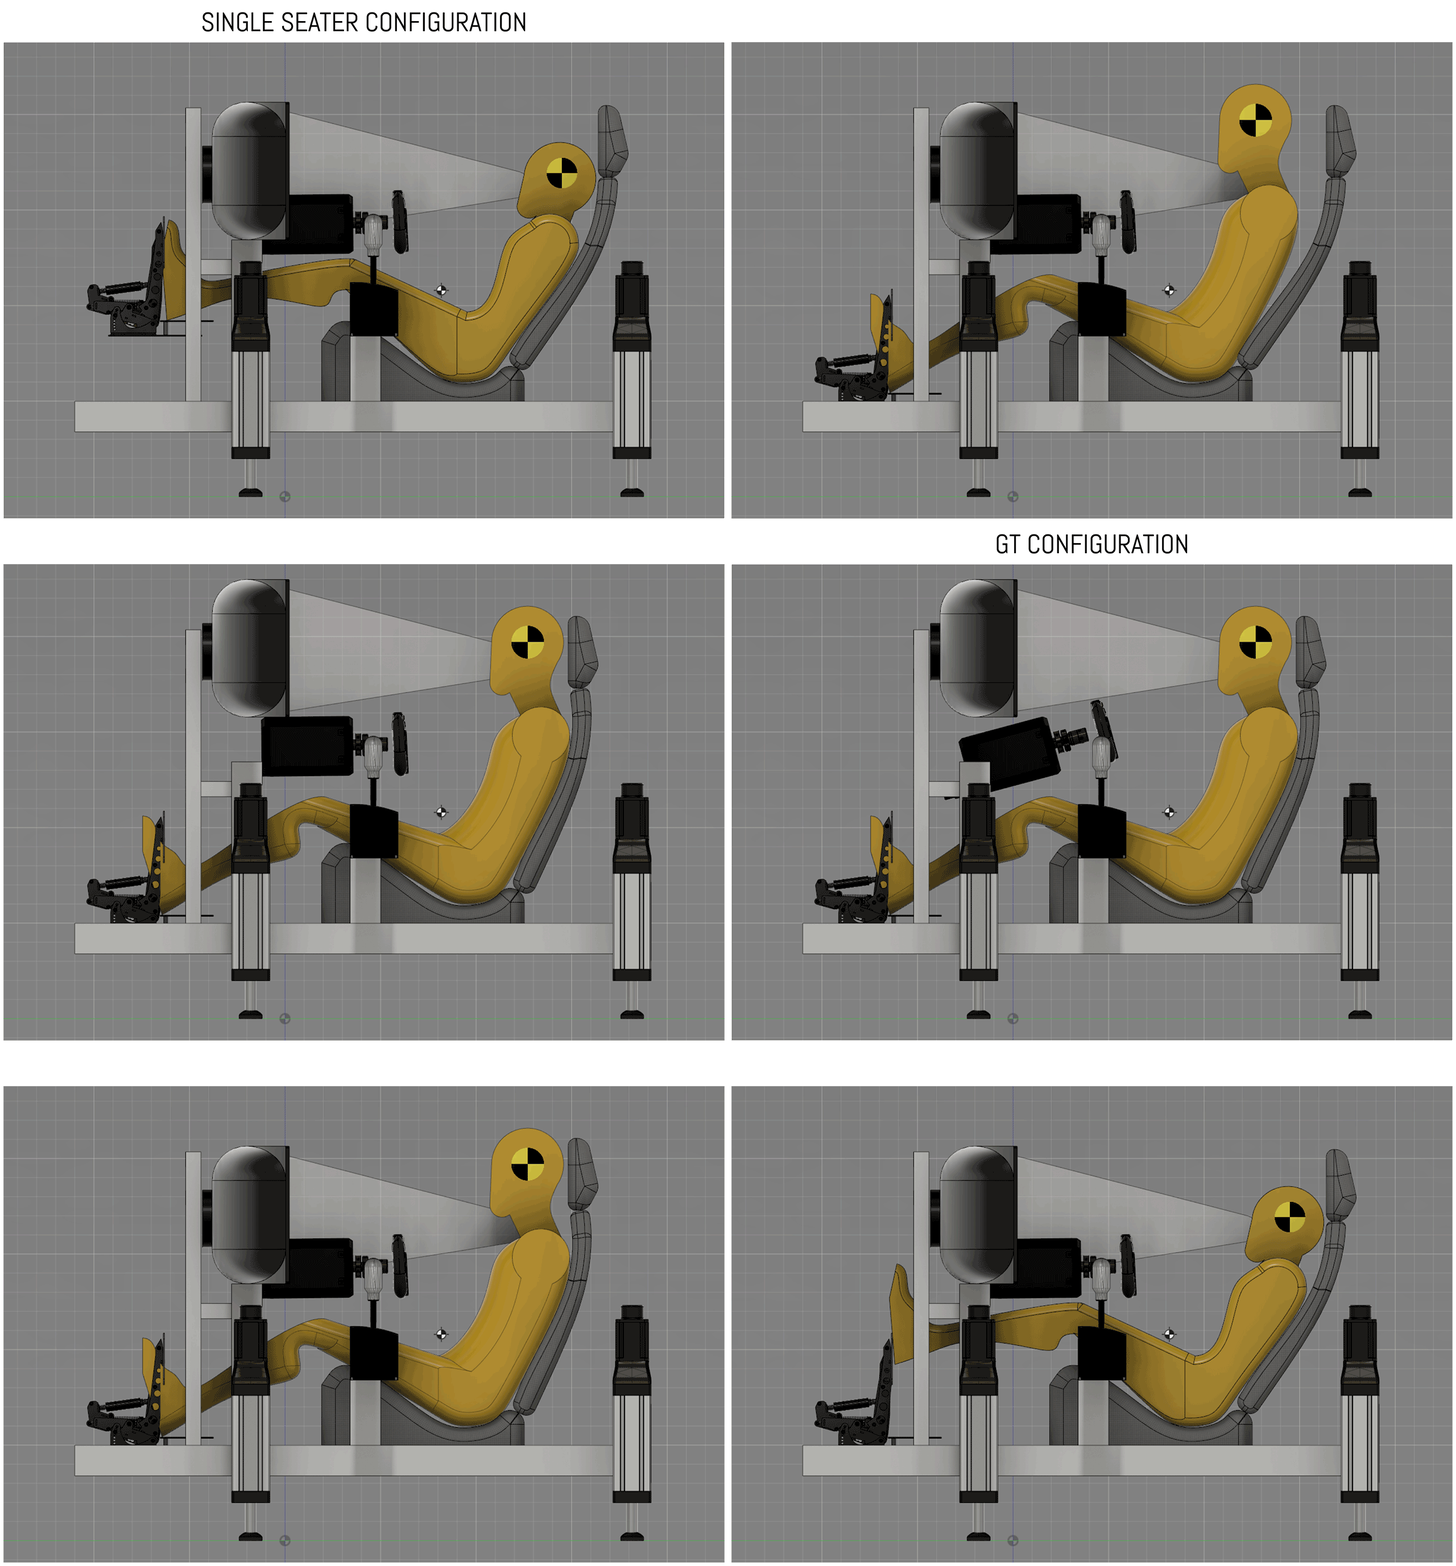
I've always enjoyed single seater as well as GT cars.

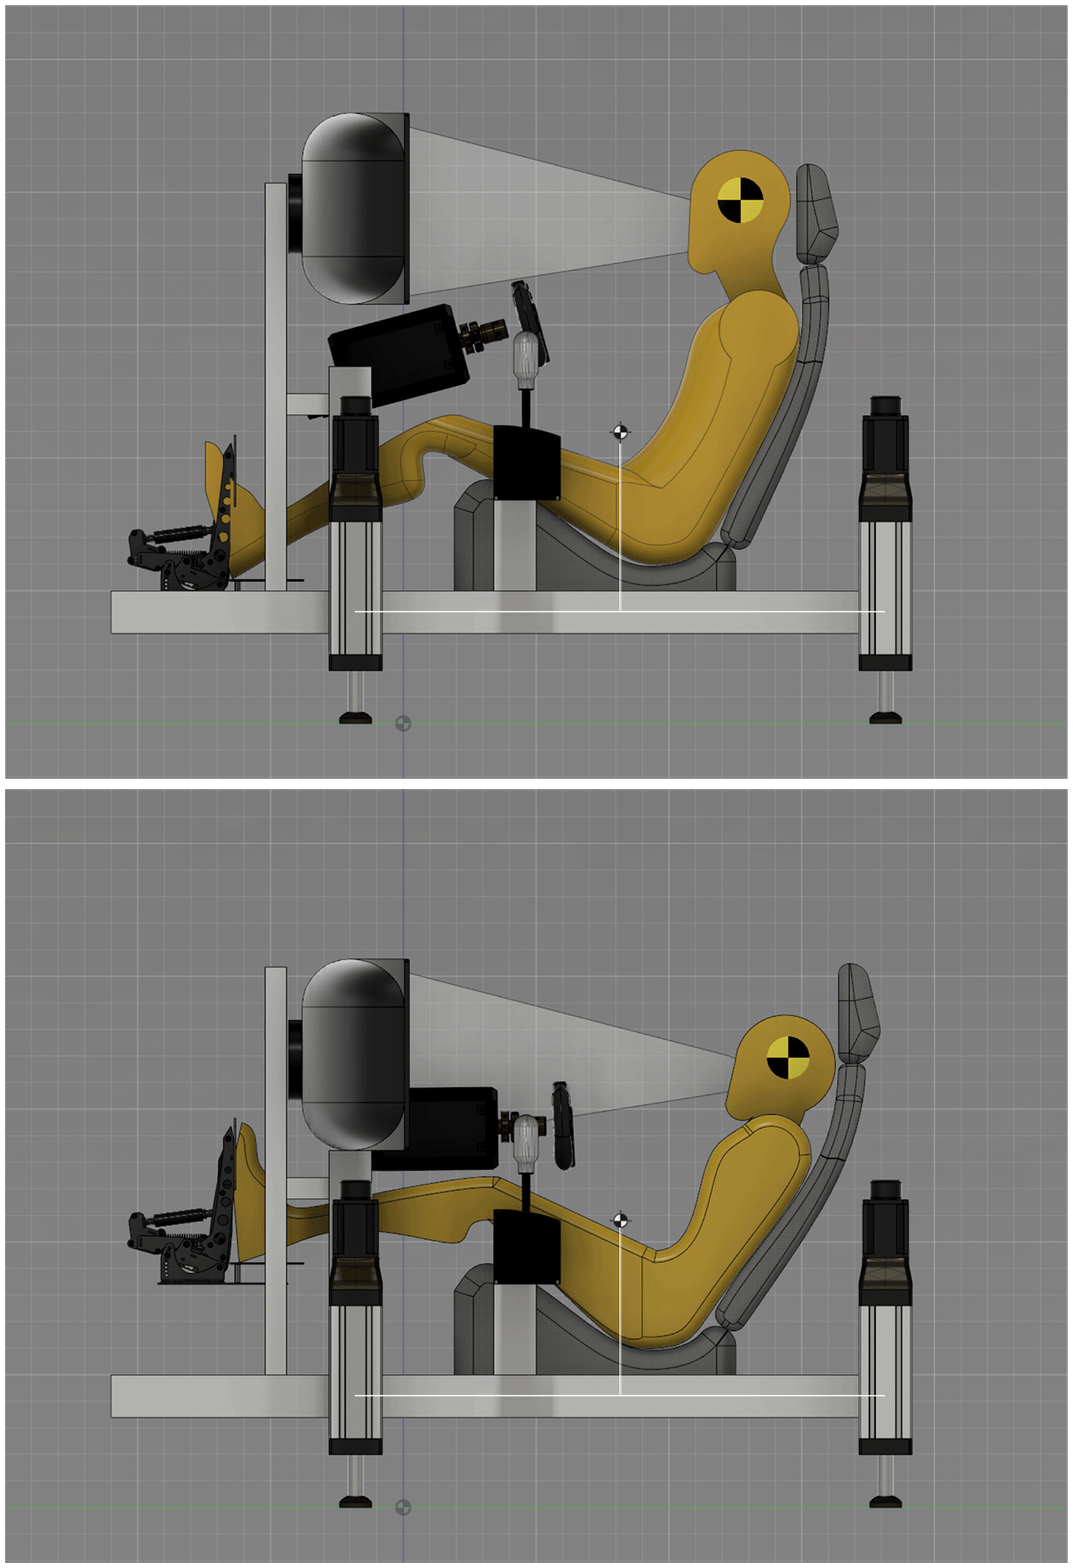
So been thinking about a multi-configurable rig.

(you may need to allow a bit of time for gifs to load in)

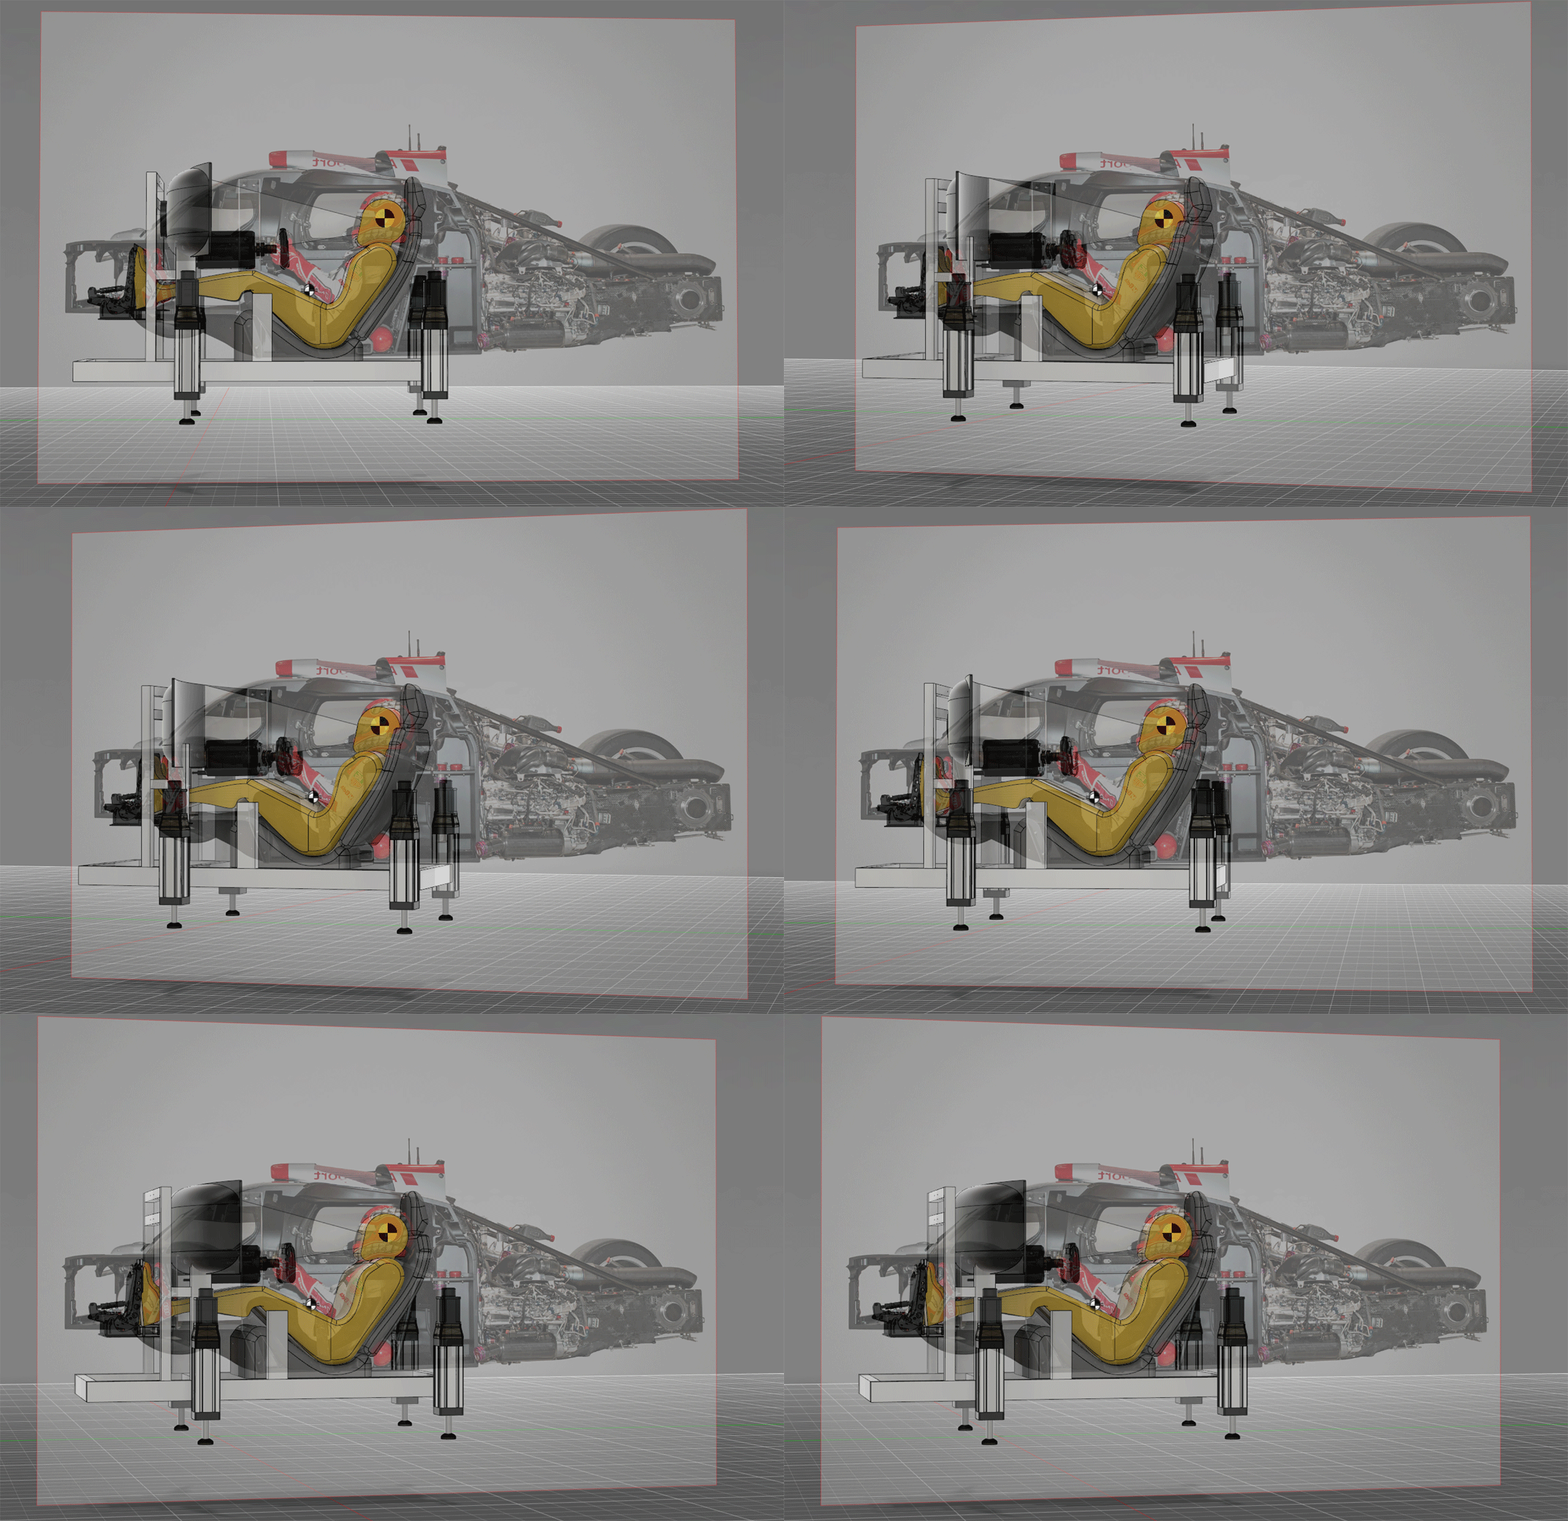
Heres a Audi R18 setup reference. For me, this works for open wheelers and LMP cars etc.

IY9vKoD.gif


(Ive already figured out the seating position for the GT car in previous posts.)
------------------------------------------------------------------------------------------------------------------

Heres the idea:
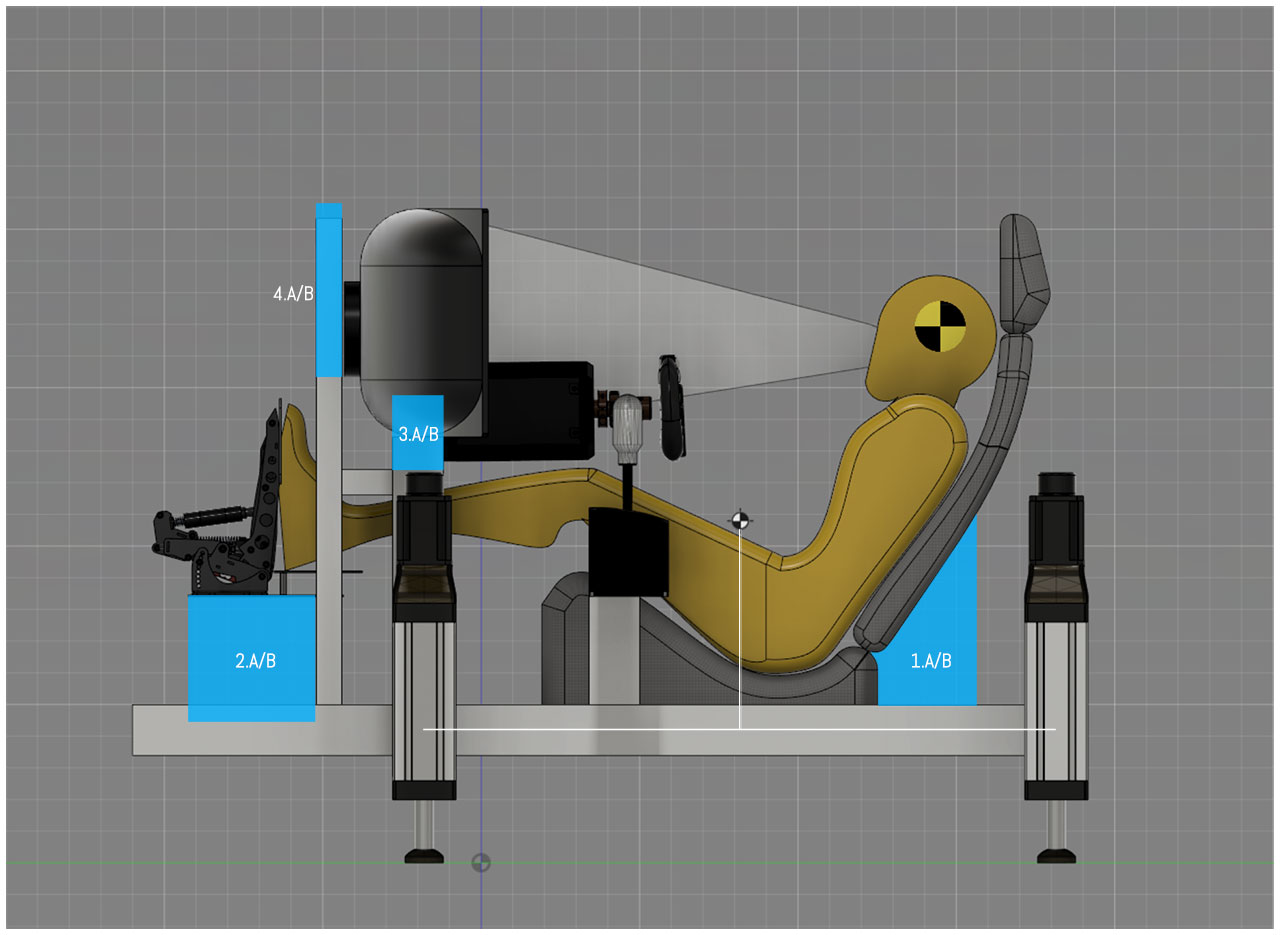
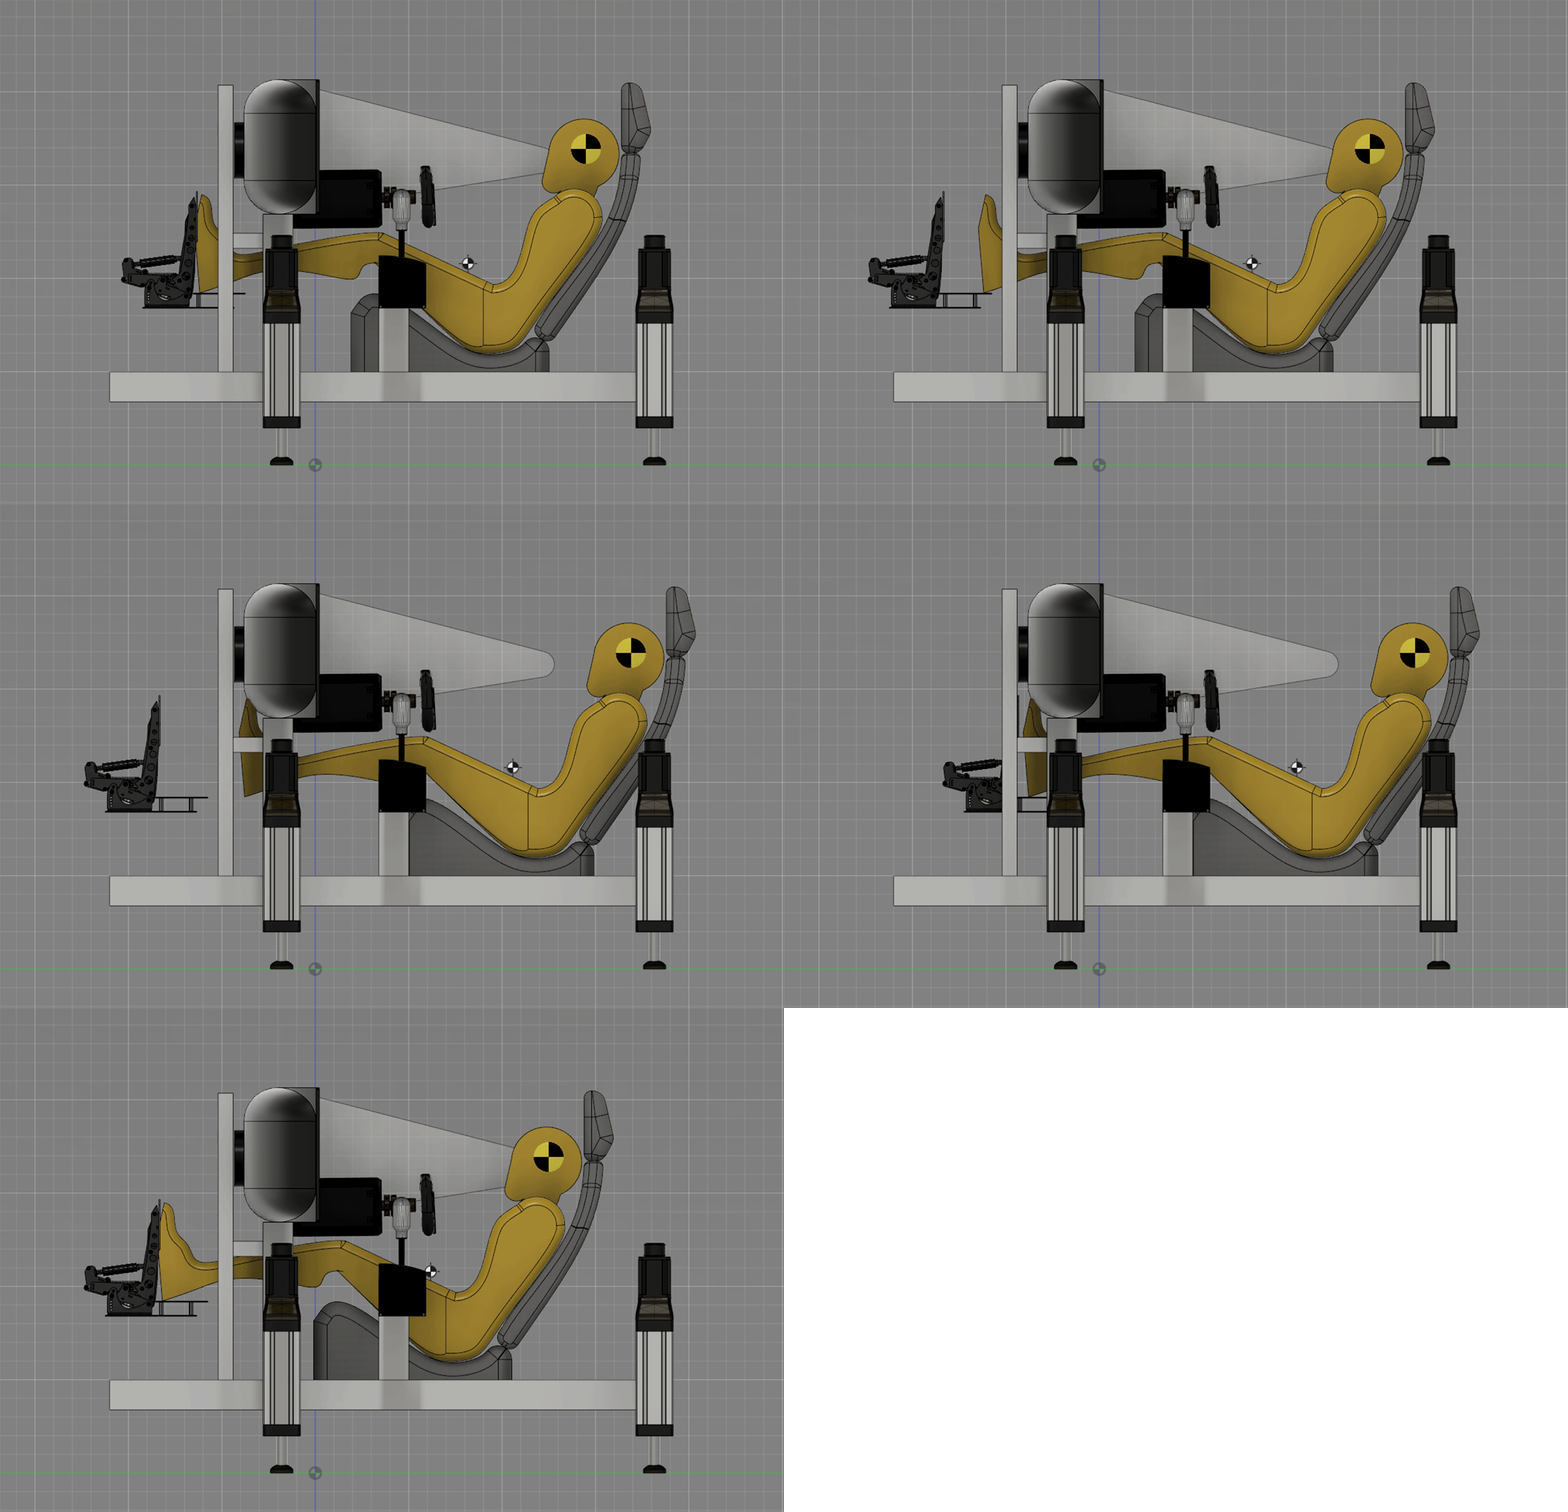
There are 4 preset positions that change configurations.
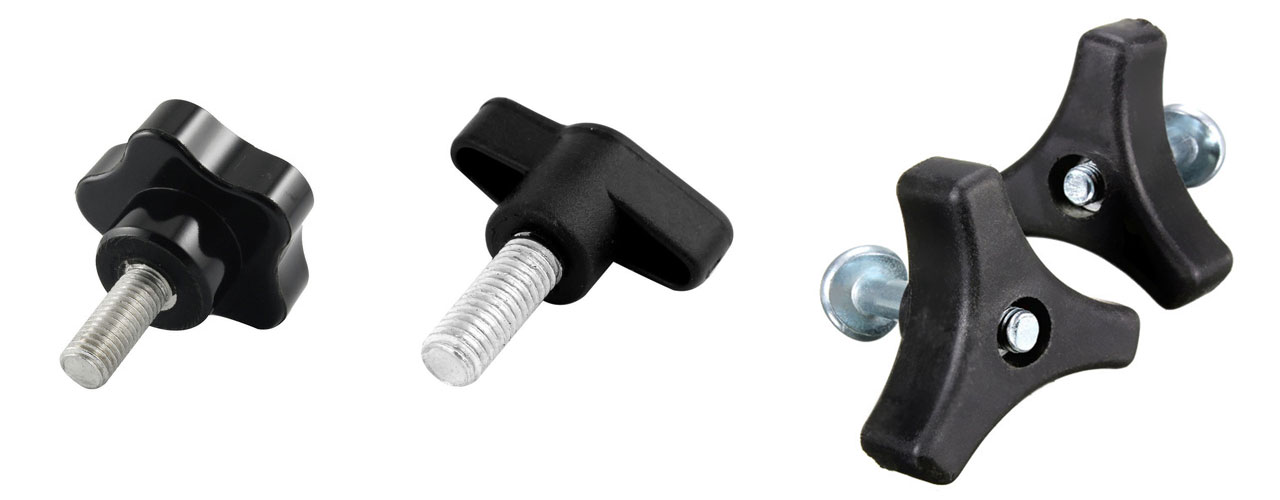
I've started working on a simple system that will allow the Single Seater preset be changed to a GT preset configuration. Ill share more on this once Ive got it more resolved, but it basically plates with sliding cutouts that allow a hand adjustable clamping screw bolts to fasten assemblies into two preset positions.

t0TLQQg.jpg


These four areas are here:
uujYqy1.jpg


That will allow us to "quickly" do this:
I54wQ6k.gif


In more detail (each of the 4 preset changes):

zxvwyPl.gif


Normal pedal and seat travel functionality is still in tact:

e7NmFzn.gif


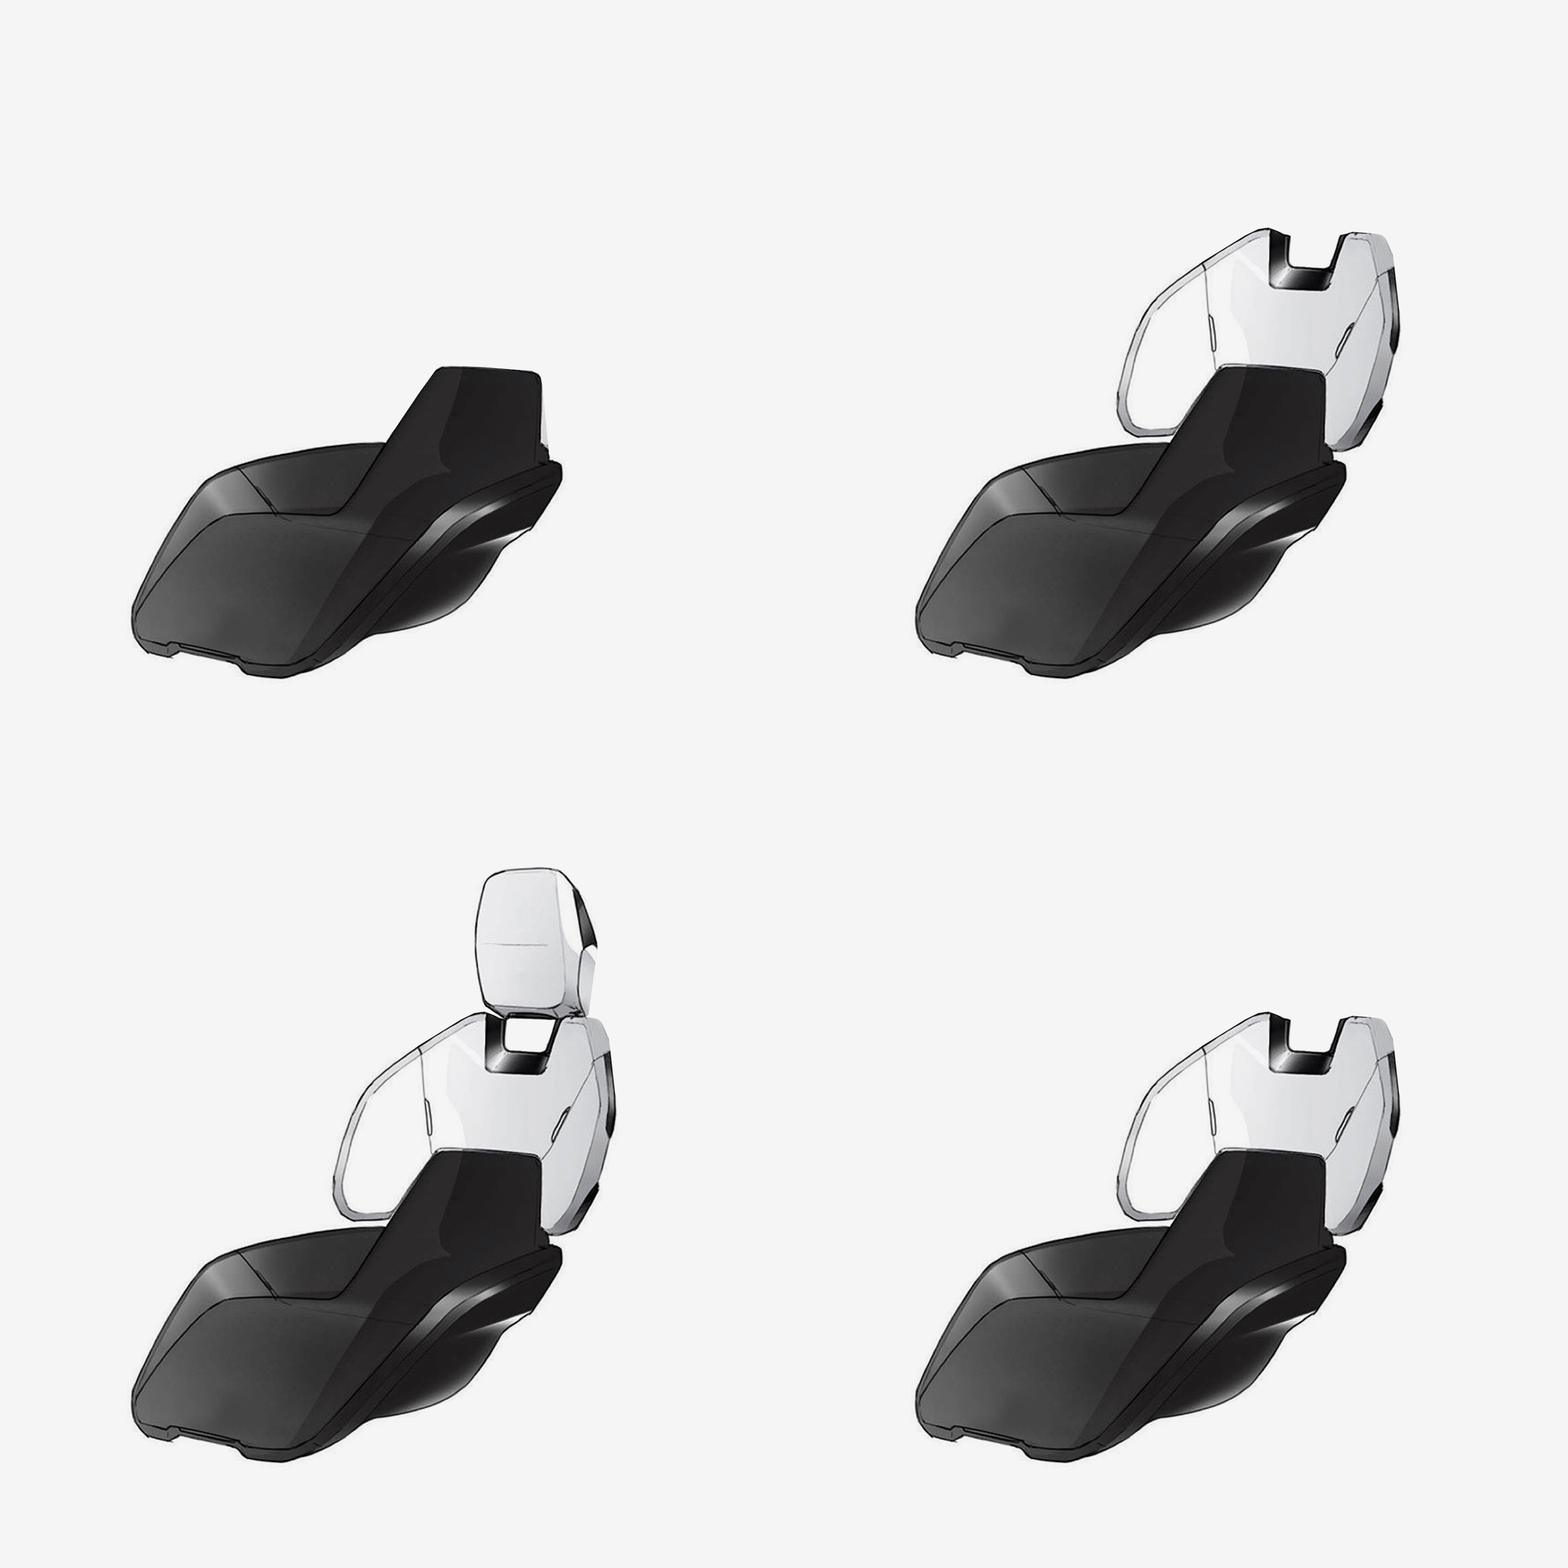
The seat will have to be custom made, and its separated into 3 parts to change shape.
The design will be something like this:

ELgleAu.gif


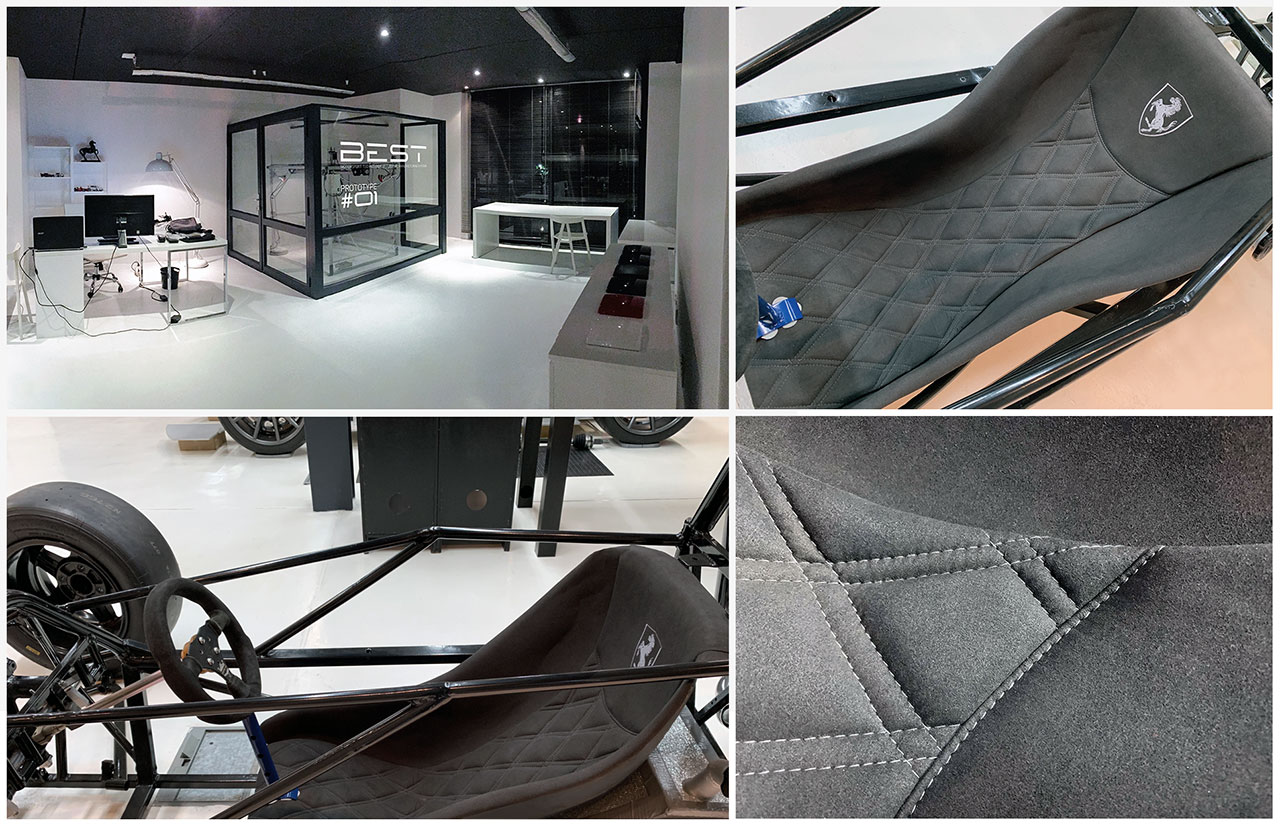
Im doing my best to design everything with off the shelf components, but the seat is more of a customized item. I have the facility to fairly rapidly do R&D on a design and 3D print the entire seat in single sections in industrial grade abs.
Once the design is working, if there is enough interest, we can do something along the lines of what Pyronious did with the Shields.
Get them injection moulded somewhere, and be made available for the community at cost.

xaQkXWz.jpg

^^^
Ive done a few custom one off seats as end use 3D printed components, and they can made to look pretty decent with upholstery (above).

Thanks for great work!

I will be building 8020 rig soon and this overview gave me good idea about seating positions with relation to pedals and wheel and what to consider when building a rig in terms of adjustability.
 
Upvote 0
Prints look super clean. Layer adhesion looks immaculate.
Have you managed to test the strength as a comparison?

I've not done any quantitative testing. There's lots of testing reports on strength vs. nozzle size. Prussa found a 30% increase when using a 0.6mm nozzle vs. 0.4 (link here: https://blog.prusaprinters.org/everything-about-nozzles-with-a-different-diameter/) This is well known, and usually listed as one of the key benefits of printing with larger nozzles, that you get increased strength. There's some simple physics that explains this.*

I also increased the infill percentage on these parts from 20% to 25%. I've no doubt these parts are stronger than the stock settings, but no, I've not done any testing myself beyond their successful use in building SFX actuators.
_____________________________________
*in a composite structure like an FDM part, impact strength is a function of how well each layer melts and bonds with adjacent layers. For 3D printers, the degree of bonding is related to how much the newly extruded layer melts and bonds with the previously deposited structure. Many things effect this, but among the most important is how hot the filament is, and how that heat transfers and melts previously deposited layers.

Heat content in the filament is a function of volume, while heat transfer (cooling) is a function of surface area. Larger diameter filaments have a lower surface area/volume ratio, and hence will carry more heat during deposition, and will cool more slowly. This allows more of the heat to transfer to the adjacent layers, melting proportionally more of these adjacent layers and improving the melting and adhesion between the new deposition and the underlying structure. This is the main reason that larger nozzles give stronger parts.
 
Last edited:
Upvote 0
I'm considering this design:

upload_2019-9-25_19-54-55.png

The seat would be attached to the rod, along which it would be allowed to rotate which would in effect allow seating position adjustment to some degree (not as configurable as your design), but it could be potentially simple to implement.

I need to get the design going in Fusion to see how viable this could be, it's just an initial idea for now.
 
Upvote 0
I'm considering this design:

View attachment 326154
The seat would be attached to the rod, along which it would be allowed to rotate which would in effect allow seating position adjustment to some degree (not as configurable as your design), but it could be potentially simple to implement.

I need to get the design going in Fusion to see how viable this could be, it's just an initial idea for now.

Im gonna share the multi-config design once its done, so if youre interested ... just saying :)

this kind of contradict it

Yeah theres been a lot of debate on that ...

BUT, in the context of how these parts are being used, what @diablo2112 makes sense.
These parts are essentially being clamped together in assembly. The forces applied to the parts are the opposite of what is happening in Cnc Kitchens' test.
This is more about COMPRESSION of the parts. The higher infill withstands compression better than a lower infill.
 
Upvote 0
Hi Guys - preparing for the buy and build process. Have extrusion on the way from Kinetic who were very easy to deal with (thank you Norman).
Questions to those who have built. I have worked my way through the whole thread and learnt much - thanks for sharing - it’s a great community)

1) How long are the cables from controllers to motors
2) Is it possible to extend these to allow rig separation from the controllers and power (my PC is in a cabinet around 6 m from my rig) and space is limited around rig as it’s in a ‘shared space’

3) Are there any foreseen/ known issues with extending the motor cables longer than ‘standard’
4) Can servo seller (David) supply longer cables

Any advice in this domain would be appreciated

Thanks in advance for your support.
 
Upvote 0
Cables are fairly long. From memory, I'd say in the range of about 3 meters. I'd be cautious extending these. The Chinese suppliers are very good at taking requests. I'd ask them via message, and see if they can provide a custom length for you, and if there's a limit to that length.
 
Upvote 0
Yeah cable length is 3mtr.
The beauty of the control units is that they are all separate, so you can arrange them as you wish.
Most people (me included) have put them in a cabinet, but there is no reason why you cant put them on top of one another and have a VERY small footprint, or even wall mount them on their sides so they are only 3 or 4 inches away from the wall.
In fact I have even seen some put them under the seat section of their rigs, taking up no extra space at all.
I am sure with a little ingenuity you could come up with a space saving way to have them.

All you need then is a long USB cable to your PC (and a wifeless mouse/keyboard and screen/VR cable).
 
Upvote 0
Anybody know if its safe to put a smartplug on my step-up converter so I can turn it on/off via a voice command? It's not in a convenient location and I don't want to wire up another switch.
Basically turning it on/off with a smartplug is the equivalent of keeping the unit's power switch turned on all the time and plugging it in / unplugging it when I want to power it on/off. Will my step-up converter not like that?

Edit: I'm talking about a smartplug between the step-up converter and my wall receptacle. Not between my step-up converter and the motor controllers.
Curious as well...
 
Upvote 0
My build is close to completion and I have been considering my simvibe setup. Should I keep it or let it go?
My tactile setup consists of 4 mini Buttkickers and an Emotiva XPA-5 amp along with Sim Commander4.
If it’s not needed any longer I was considering moving the amp upstairs and using it in my home surround sound. I’m sure that amp will add a little punch to the home stereo.
Let me know what you think.
My plan is to keep only the gamer 2 and just for engine revs and gear shifts, and get rid of the small ones I have on each corner, but lets see what experienced guys say
 
Upvote 0
My take at reducing the EMI of the servos:

1.jpg


As others have mentioned this video shows the result of using a power line filter and ferrite cores.
Read this article for more information about servos, EMI and ferrite. Please note the picture of the servo controller at the bottom right with the ferrite core around the U, V and W wires. @Tronicgr_6DOF wrote a post about EMI as well.

I have bought a bag of 50 low frequency ferrite rings and put four of them around the cable and looped each wire through another ferrite ring for more effect.

2.jpg


I also added a Schaffner FN 2090-16-6 power line filter which should reduce EMI going back into the power lines (and thus to other equipment). I bought the 2090 instead of the 2070. If you look at the data sheet of the 2070 and the 2090 the damping is similar:

FN 2070 (graph shows damping)
FN2070.png


FN 2090

FN2090.png

Schaffner says “FN 2070 two-stage filters are designed for high frequency attenuation”. As stated in the Granite Devices article above: “For motor control applications it is recommended to get low to medium frequency ferrite cores for maximum efficiency.” It seems unnecessary to me to use a power line filter for high frequencies and the 2090 is 18 euro cheaper than the 2070.

I also added clip-on ferrite cores on all USB cables and grounded my rig. I’m planning to route the servo power cables through the channels of my rig as some form of EMI shielding.

Is this enough? I don’t know yet, I’m still building my SFX100, I hope so.

@cfischer9009 has gone even further by replacing the unshielded servo power cables with shielded ones, something to consider when there are still EMI problems.
 
Last edited:
Upvote 0
Been sourcing parts for my build.
New to extrusion rigs.

Can't find the correct 100*100 profile in Melb :(

Come across this which is closest.
Would it work?
I've noticed it's slightly different to the suggested.

Holes are 12mm (M14)
 

Attachments

  • Annotation 2019-09-27 202151.png
    Annotation 2019-09-27 202151.png
    69.9 KB · Views: 253
Upvote 0

Latest News

What do you wear when racing?

  • Barefoot

    Votes: 0 0.0%
  • Socks

    Votes: 3 60.0%
  • Flip flops

    Votes: 0 0.0%
  • Shoes

    Votes: 1 20.0%
  • Simracing socks

    Votes: 0 0.0%
  • Simracing shoes

    Votes: 0 0.0%
  • Other, specify in thread

    Votes: 1 20.0%
Back
Top